13 | Claude Code in 16 Hours: CLI, Modes, Slash Commands, and Checkpoints
Use the CLI, modes, slash commands, and checkpoints to control sessions and keep recovery points.
34 · CLI Reference Manual: Commands and All Flags
“How can you add parameters after claude'? I've always just typed claude’ in.”
“Yes, there are many. Let the script run claude -p 'summarize this PR', and the result will be spit out directly into the file without entering the interactive interface at all.”
“Wait a minute - what is -p? claude --help I have been browsing for a long time and haven’t read it all.”
This conversation is quite common. Many people have been using Claude Code for just half a year, but they can only type claude to enter the interactive mode, and they have no idea that there are dozens of flags behind this command. No one can blame this - the official documentation itself wrote a sentence: claude --help Not every flag will be listed. If you just rely on --help, you are bound to miss a large area.
To put it bluntly, we have been in the “interactive mode” in the previous thirty or so articles: go in, chat, and work with it. But claude is essentially a command line tool. The gameplay of a command line tool goes far beyond “opening an interface” - it can take over channels, insert scripts, and judge success or failure based on the exit code. Today’s article is that “instruction sheet”: spread out claude’s commands, flags, pipe usage, and exit codes at once, and just flip through the table if you want to check which one in the future**.
After reading this article, you will get:
claude’s core command list: start, with initial prompt, pipeline, continue/resume session, update, login, what each does- The most commonly used flags (
-p/--model/-c/--resume/--permission-mode/--add-dir, etc.) are explained one by one, with a complete comparison table - Headless and pipeline usage: how to insert Claude into a script, act as a linter, and connect
jqto process output - How to read the exit code: How to use it to determine whether “it’s successful or not” in the script
- A complete set of headless links that can be followed: naked calls, pipeline feeding, structured output, exit code judgment
01 First distinguish between two words: command vs sign
Before turning over the table, let’s pin down the two most confusing words. **The whole line you type in the terminal can be broken down into two things: command and flag. **
**Analogy: Fill in the form when sending a courier. ** claude is the “send” action itself; the following update and mcp are sub-actions (commands), telling the system that you are not sending ordinary mail today, but that you want to “update” or “match MCP”; and the following -p and --model are the check boxes (flags) on the order, fine-tuning how to send this trip - is it urgent? Insured? Which model to send? Choose one action and check a bunch of check boxes.
Down to specifics:
claude update
claude -p "解释这个函数" --model sonnet- First line:
claudeis a program,updateis a command (a sub-action, exit after running). - The second line:
claudeis not followed by a command, and enters the session logic directly;-pand--modelare both flags, and"Explain this function"after-pis the initial prompt for this trip.
Why should these two be distinguished? **Because they are listed in two tables in the document, you have to know which table you want to check when checking. ** If you want to know “how to update / how to log in / how to configure MCP” - check the command table; if you want to know “how to change the model / how to output the results directly without entering the interaction / how to make it not ask for permission first” - check the flag table.
There is another thoughtful detail worth remembering first: If you type the wrong command, it will prompt you. The official text says it very clearly——
If you enter an incorrect subcommand, Claude Code suggests the closest match and exits without starting a session. For example,
claude udpatewill printDid you mean claude update?.
It is common for your hand to type claude udpate by mistake. Every time it asks you honestly, “Do you want to type claude update?”, it will not start a session with a wrong word.** This little thoughtfulness saved me a lot of confusion about “Why didn’t you respond?”
💡 One sentence summary: One line of commands can be divided into two parts - The commands are sub-actions (
update,mcp, exit after running), and the flags are check boxes (-p,--model, fine-tune how to run this run); first think about which table you want to check when checking the document.
02 Core commands: postures to start a session
Let’s look at the command first. There are only a few words that you can actually type every day. I will talk about them in three groups according to “purpose”, and each group will be assigned the official standard writing method.
Group 1: Start session (most commonly used)
This is what you use 90% of the time:
# 1. 光秃秃启动,进交互模式
claude

# 2. 带一句初始提示启动(进去后它先回答这句)
claude "解释这个项目"

# 3. 不进交互、直接出结果就退出(headless / 打印模式)
claude -p "解释这个函数"
You are already familiar with the first two. The third article claude -p is the “another way to live” that this article will focus on - it does not open the chat interface, directly prints the answer to the terminal and exits, specifically used for scripts and pipelines. Section 04 details.
The second group: continue the last chat (don’t let it lose its memory)
Remember what I said in Chapter 19 - Every time a new conversation opens, Claude becomes a “new intern with amnesia”, and he forgets everything about the last conversation. These two commands cure amnesia:
# 继续「当前目录」最近的那次对话
claude -c
# (--continue 是它的全称,-c 是简写)

# 按 ID 或名字恢复「某一次特定」的对话
claude -r "auth-refactor" "把这个 PR 收尾"
# (--resume 是全称,-r 是简写)
**The difference between the two is just one word: “recently” or “specified”. **
-c(--continue): Only recognizes “the most recent ** time in the current directory”. You don’t need to remember the ID, which is the most convenient.-r(--resume): Which roll call is required - Give the session ID or the name you used--namebefore; if not, an interactive list will pop up for you to choose.
**Analogy: Continue chatting with colleagues. ** -c means “let’s continue talking about the thing just now” - the default is the most recent thing, no need to explain which one it is; -r means “last Wednesday’s thing about login reconstruction, let’s continue” - you have to clearly point out which thing it is, so that the other party can find that memory.
A handy habit: Use -c when advancing on one line, so as not to remember the name; do several jobs at the same time (checking bugs in this one, writing tests in that one), and then use -r to restore them by name - provided that each job is named with --name (abbreviated -n) at startup, otherwise you will not be able to identify which one is which among a bunch of UUIDs. A complete process looks like this:
# 启动时起个好认的名字
claude -n "login-refactor"

# 几天后回来,按名字直接恢复这一摊
claude -r "login-refactor"
The official explanation of --name is very straightforward - the display name it sets will appear in the /resume list and terminal title, and can be restored later with claude --resume <name>. When pushing three or four tasks at the same time, it is much better to rely on this name to identify people than facing a string of 550e8400-... UUIDs.
There is another combination worth checking out separately: -c and -p can be used together. claude -c -p "Check if there are any type errors" means “continue the most recent conversation, but this time go headless and exit when the results are obtained” - it carries the last context, but does not enter the interactive interface. This combination is especially convenient when you want to “advance the same task in several steps and run automatically at each step” in the script (the example of continuous --continue in Section 04 is like this).
Group 3: Maintenance and Accounts
The remaining group is not often typed, but you have to know that they are:
# 更新到最新版
claude update

# 安装 / 重装本机二进制(可指定版本:2.1.118 / stable / latest)
claude install stable

# 登录 Anthropic 账户
claude auth login

# 查登录状态(已登录退出码 0,未登录退出码 1)
claude auth status
The details of claude install that can be combined with the version number are very life-saving at critical moments: the official said that it accepts specific version numbers such as 2.1.118, as well as stable and latest**. Imagine a situation where a certain behavior becomes unsuitable after a new version is updated. Use `claude install 2.1.
claude auth status The phrase “logged in exit code 0, not logged in exit code 1” first remember, we will come back to use it when we talk about exit codes in Section 05 - this is the standard trick in the script to determine “whether you are currently logged in or not”.
These items all require an Internet connection. If domestic access to the Anthropic account system (login, update package) is not possible, first open “Magic Internet” and then try again.
💡 One sentence summary: The commands are divided into three groups - Start the session (
claude/claude "prompt"/claude -p), continue the last chat (-cto recognize the latest,-rto restore by name), and maintain the account (update/install/auth);-cand-rare two medicines to cure “session amnesia”.
03 The most commonly used symbols: explain them one by one
After the order is recognized, the highlight is the sign. There are dozens of signs, but you only use seven or eight frequently in daily life - I will explain these thoroughly first, and then give you the complete list (Section 06 attaches a complete comparison table, that is for “checking”, this section is for “understanding”).
-p / --print: No interaction, output results directly
The most important one, bar none. **With -p, Claude will not open the chat interface - it reads your prompts, does the work, prints the results, and exits, and no one is watching the whole process. **
claude -p "这个项目的 auth 模块是干啥的"It is the switch for headless (headless, meaning no interactive interface, pure command line running) mode switch, and it is also the foundation for all subsequent “inserting scripts” and “taking over pipeline” gameplay. Section 04 is dedicated to expansion.
--model: Which model to use for this trip
Temporarily specify which model to use for this session, overwriting the default model in your settings:
claude --model sonnet
claude --model opus
claude --model claude-sonnet-4-6   # 也可以写完整名字
You can use aliases (sonnet, opus point to their latest models), or write the complete model name. How to select a model and what positioning of each file has been discussed in Part 05. Here we only focus on “how to temporarily switch on the command line”.
--permission-mode: Which permission mode will this trip start from?
Decide directly, “Claude, should I ask you before taking action?” Do you still remember the “authority reins” in Chapter 20 - this sign is to set the tightness of the reins at the moment of startup:
claude --permission-mode planThe official optional values are as follows:
Accepts
default,acceptEdits,plan,auto,dontAskorbypassPermissions. OverridedefaultModein settings file.
To put it simply: plan (only planning without doing anything), acceptEdits (automatically approve files for modification), bypassPermissions (full release, use with caution) are the most commonly used. What are the temperaments of these modes? The next article (Part 35) will be dedicated to dismantling them. Here you only need to know that “use this flag to select the mode in one step at startup.”
--dangerously-skip-permissions: The switch with dangerous name
This sign is mentioned in isolation, because novices are most likely to ask questions and use it indiscriminately. Its function is to skip all permission prompts - the official makes it clear that it is equivalent to --permission-mode bypassPermissions**:
claude --dangerously-skip-permissionsWith it, Claude will never stop to ask you when changing files or running commands, and will just keep working to the end. The name directly says dangerously (dangerously), which means Anthropic is reminding you to think carefully. Articles 20 and 21 have repeatedly emphasized the “authority reins” - this switch is equivalent to letting go of the reins entirely.
There is a red line that should be kept here: **Only use it in environments that are “clearly isolated and it doesn’t matter if it breaks” - such as disposable containers, toy warehouses, and temporary sandboxes in CI. Don’t touch it in your real project directory, especially where you have access to production data. For headless batch processing, if you want to have fewer permission prompts, you should first use --allowedTools to accurately allow a few tools, or use --permission-mode acceptEdits to only allow “modify files” - it is much safer than allowing all tools across the board.
--add-dir: Let it look at one more directory
By default, Claude can only read/modify the directory you are in when you start it. --add-dir gives it access to several additional directories:
claude --add-dir ../apps ../libTypical scenario: Your project and another library it depends on are separated into two folders, and you want Claude to be able to move both sides at the same time. Pay attention to the official reminder——
Grant file access; most
.claude/configurations will not be discovered from these directories.
In other words: --add-dir only gives “read and write files” permission, and will not also load the CLAUDE.md and Skill configurations in that directory. Don’t expect to inherit other people’s configuration just by adding a directory.
--output-format: In what format the results will be spit out
Only meaningful in -p print mode, controls what the result looks like:
claude -p "总结这个项目" --output-format jsonThree options: text (default, plain text), json (structured results with metadata such as session ID, cost, etc.), stream-json (one JSON event per line, real-time streaming). If you want to get “how much did this trip cost” and “what is the session ID” in the script, you have to use json - Section 04 will demonstrate how to feed it to jq.
--allowedTools / --disallowedTools: whitelist/blacklist
Allow (or deny) certain tools in advance to prevent headless from getting stuck on the permission prompt midway through the process (scripts that no one is watching will become useless as soon as they get stuck):
claude -p "跑测试并修掉失败" --allowedTools "Bash,Read,Edit"--allowedTools allows the listed tools without prompting**; --disallowedTools denies them in turn. They use permission rule syntax (see Part 20 for details). For example, "Bash(git diff *)" only allows commands starting with git diff.
Note the difference with --tools - --tools directly deletes a tool from the model context, making it completely unusable; --allowedTools just skips the permission prompt, and the tool itself is still there.
Several headless-specific “fuses”
These are only effective in -p mode, but they are very practical and are designed to prevent scripts from getting out of control:
# 限制最多跑几轮,超了报错退出(默认无限制)
claude -p --max-turns 3 "查询"

# API 花费一旦超过这个金额就停(单位美元)
claude -p --max-budget-usd 5.00 "查询"
--max-turns There is a small pitfall here: I forgot to add it when writing the automation script. If Claude gets stuck in a cycle of trial and error, the number of turns will increase and the cost will increase accordingly. If no one is watching the script, money will be wasted. A safe approach is to always add --max-turns to batch scripts, which is equivalent to setting a hard upper limit of “a maximum number of turns” for it. If it exceeds, it will report an error and exit, which is more practical.
💡 One sentence summary: remember these high-frequency flags -
-pdoes not allow interaction when outputting results,--modelcuts the model,--permission-modedetermines the tightness of permissions,--add-dirlooks at more directories,--output-format jsongets structured results,--allowedToolspre-release tools; if the script is afraid of losing control, add--max-turns/--max-budget-usdacts as a fuse.
04 headless and pipes: plugging Claude into the command line
This section is where claude -p really shines. The previous dozens of Claude articles were all about “you open a window and chat with it.” In this section, it becomes “a part in the command line that can take over the pipeline” - it can be fed data by other commands, and it can also spit out the results to the next command.
Analogy: A work station on an assembly line. ** The interactive mode is like you sitting in front of the workbench and working one by one; the headless mode is welding Claude to an assembly line - ** the previous process (such as cat, git diff) sends the materials in, Claude finishes processing, and the results flow directly to the next process (such as writing files, feeding jq). You don’t have to stand by, the whole line runs by itself.
Pipeline: Feed data in
Non-interactive mode reads stdin (standard input), so you can pipe data into it using | as you would any command-line tool:
cat build-error.txt | claude -p '简明解释这个构建错误的根本原因' > output.txtThis command does three things: cat spits out the log content → pipes it to claude -p → it interprets it, > writes the results into output.txt. **No interface is entered in the whole process, suitable for plugging into any automated process. **
There is an official clear upper limit worth remembering: starting from v2.1.128, the upper limit of content fed through the pipeline is 10MB. If it exceeds the limit, Claude Code will report a clear error and exit with a non-zero status. To handle larger inputs, write the content to a file, quote the file path in the prompt, and don’t pipe it.
Used when a project-specific linter
By wrapping headless calls into a script, Claude becomes your project’s “dedicated reviewer.” The official package.json example is very typical - feed the diff of main to Claude and let it pick out spelling errors:
{
  "scripts": {
    "lint:claude": "git diff main | claude -p \"you are a typo linter. for each typo in this diff, report filename:line on one line and the issue on the next. return nothing else.\""
  }
}
Then npm run lint:claude will run. Benefits of pipe feeding diff: Claude does not need Bash permissions to read the diff by himself, you feed it in.
Connect jq to process structured output
If you want to get only the result text or capture the session ID in the script, use --output-format json with jq (a command-line JSON processing tool):
# 只取结果文本
claude -p "总结这个项目" --output-format json | jq -r '.result'
The json format spits out an object with metadata - the result text is in the .result field, the session ID is in .session_id, and total_cost_usd how much the trip cost. The script needs to string together multiple rounds of conversations by first grabbing session_id and then --resume:
session_id=$(claude -p "开始审查" --output-format json | jq -r '.session_id')
claude -p "继续那次审查" --resume "$session_id"
Give this script call a “temporary identity”
When running batch processing in headless, we often want Claude to play a specific role in this run - for example, “You are a security engineer who specializes in finding vulnerabilities.” Use --append-system-prompt to append this command to the end of the default system prompt. In this official example, the PR diff is fed to it for security review:
gh pr diff "$1" | claude -p \
  --append-system-prompt "You are a security engineer. Review for vulnerabilities." \
  --output-format json
There are two flags to distinguish here, and don’t use them incorrectly: --append-system-prompt means “append after the default prompt”. Claude still retains its original set of programming assistant skills and security instructions, you just add an additional requirement; --system-prompt means “replace the entire” default prompt - even tool usage and security constraints are gone, and you are responsible for everything else. In 90% of cases, what you want is append (append), not system-prompt (replacement); only use replacement when the default identity of Claude’s “Programming Assistant” is not suitable for your task at all.
--bare: faster startup in scripts
There is also a flag specifically for scripts --bare (naked mode). Official words:
Minimal mode: Skip automatic discovery of hooks, skills, plugins, MCP servers, automatic memory, and CLAUDE.md so that scripted calls start faster.
To put it bluntly, normal claude -p will load the entire set of contexts for the interactive session (your CLAUDE.md, installed Skills, and configured MCPs); --bare skips all of them, leaving only the three basic capabilities of Bash, reading files, and changing files. It starts quickly and the results are consistent on each machine (it will not be affected by someone’s private stuff in ~/.claude). Especially useful in CI and scripts. The official documentation also clearly states: --bare will become the default value of -p in future versions. It is worth developing this habit now.
The difference between interactive mode and headless mode can be seen most clearly side by side:
| dimensions | interactive mode (claude) | headless mode (claude -p) |
|---|---|---|
| Is there a chat interface | ✅ Yes, you type back and forth | ❌ No, you will exit as soon as the result comes out |
| No one is on duty | ✅ You are sitting in front | ❌ No one is around, the script will run automatically |
| Can the channel be taken over | ❌ No | ✅ Yes, stdin can be read and redirected |
| What to do about permissions | Stop and ask before taking action | Rely on --allowedTools / --permission-mode to predetermine |
| Typical scenarios | Daily development, conversational work | CI, batch processing, working as a linter, inserting scripts |
💡 One sentence summary:
claude -pturns Claude into a component that can take over the pipeline in the command line -cat ... | claude -p ... > out.txtstring pipeline,--output-format jsonwithjqto capture fields,--bareto make script startup faster and cleaner; for tasks that no one is watching, permissions must be pre-set with signs.
05 Exit code: How does the script know whether it is successful or not?
This section is short, but the script writer cannot avoid it.
**Analogy: The “pass/fail” of an exam is a number. ** In the command line world, every command will leave an “exit code” - a number, 0 means success, non-0 means some kind of problem. It is not for you to see, but for the “upper-level script”: the script relies on this number to determine “whether this step is completed and whether to continue going down.”
You can check the exit code of the command you just ran in the terminal like this:
claude auth status
echo $?
echo $? prints the exit code of the previous command ($? is a variable in the shell that stores the “exit code of the previous command”).
The official documentation clearly provides commands for exit codes. Pick a few that you can use:
| Command/Case | Exit code | Meaning |
|---|---|---|
claude auth status logged in | 0 | currently logged in |
claude auth status Not logged in | 1 | Not currently logged in |
claude -p --max-turns N reaches the upper limit | non-0 (error report) | exceeds the number of rounds limit and exits with an error |
| Pipe stdin exceeds 10MB | Not 0 | The input is too large, a clear error is reported and the exit is not zero |
claude daemon status supervisor is not running | 1 | The background session management process is not running |
**How does this thing actually work? ** For example, in CI, if you want to “confirm that you are logged in first, and if you are not logged in, the pipeline will fail directly”, you can rely on the exit code of claude auth status:
# 没登录(退出码非 0)就报错退出,不往下跑
claude auth status || { echo "未登录,终止"; exit 1; }
|| means “If the previous one fails (the exit code is non-0), execute the next one.” You can do this in a script that runs regularly every day - first check claude auth status at the beginning. If the ** token expires, the script will stop here and alarm immediately, instead of running down halfway only to find out that you are not logged in **, wasting half a day.
Just remember this simple agreement:
0= go down successfully, non-0= stop if something goes wrong. All Claude Code commands comply with it. Look for this number when you write a script to judge success or failure.
💡 In one sentence, the exit code is “the transcript for the script” -
0is successful, non-0is a problem;claude auth statususes0/1to report that there is no login,--max-turnsexceeds the limit and the pipe exceeds 10MB and exits with non-zero, the script relies on$?or||to catch it.
06 Full list of signs: the page used to “check”
I’ve talked about high frequency before, but this section is all about it - organize the symbols you encounter every day in the official documents into a table, specifically for “checking”. There are dozens of signs, so there is no need to memorize them, just save them and look them up at any time.
A reminder of the official words:
claude --helpwill not list every flag, so if a certain flag does not appear in--help, it does not mean that it cannot be used - please refer to the official CLI reference document.
I’ve categorized them by “what they’re used for” so you can find them based on your needs:
Startup and Session
| Logo | Abbreviation | What to do |
|---|---|---|
--print | -p | Exit without interacting and printing the results (headless foundation) |
--continue | -c | Continue the most recent conversation in the current directory |
--resume | -r | Resume a specific session by ID/name, or pop-up selection |
--name | -n | Give the session a display name for convenience --resume <name> |
--fork-session | — | Create a new session ID when restoring, do not reuse the original one (with -r/-c) |
--session-id | — | Specify a session ID (must be a valid UUID) |
Models and Permissions
| Logo | What to do |
|---|---|
--model | Which model to use for this trip (alias sonnet/opus or full name), overrides the default |
--fallback-model | Automatically fall back to the specified model when the default model is overloaded/unavailable (-p and background sessions take effect, interactions are ignored) |
--permission-mode | Which permission mode to open from (default/acceptEdits/plan/auto/dontAsk/bypassPermissions) |
--allowedTools | Allow tools without prompts |
--disallowedTools | Deny rules |
--dangerously-skip-permissions | Skip all permission prompts (equivalent to --permission-mode bypassPermissions, use with caution) |
Directory and Configuration
| Logo | What to do |
|---|---|
--add-dir | Give additional read and write rights to several directories (only give file access, do not load the configuration there) |
--settings | Specify settings JSON file or inline JSON, overwriting the key with the same name in this session |
--setting-sources | Which setting sources to load (user/project/local) |
--mcp-config | Load MCP server from JSON file/string |
--bare | Minimal mode: skip automatic discovery of hooks/skills/plugins/MCP/memory/CLAUDE.md and start faster |
headless output and control (mostly only -p takes effect)
| Logo | What to do |
|---|---|
--output-format | Output format: text (default) / json / stream-json |
--input-format | Input format: text / stream-json |
--max-turns | Limit the maximum number of rounds. If exceeded, an error will be reported and exit (default is no limit) |
--max-budget-usd | API will stop spending more than this amount of dollars |
--verbose | Detailed log, showing complete round-by-round output |
--append-system-prompt | Append custom text at the end of the default system prompt |
--system-prompt | Replace the entire default system prompt with custom text |
Miscellaneous
| Logo | Abbreviation | What to do |
|---|---|---|
--version | -v | Output version number |
--ide | — | Automatically connect if there happens to be an IDE available at startup |
--debug | — | Turn on debugging mode, filter by category (such as "api,mcp") |
This table covers most of the flags you will use in the early stages. If you really want to check the complete set (there are dozens of partial ones, such as background sessions, agent team, remote control related), go to the official CLI reference page - it is the “full set manual”, and this section is a “common quick check”.
💡 One sentence summary: The flags are classified according to “Start session/Model permissions/Directory configuration/headless output/Miscellaneous” to check the fastest;
--helpis incomplete, please refer to the official CLI reference; This table is commonly used, if you are interested, go to the official complete collection.
07 Do it yourself: Connect claude -p into the command line pipeline
Just looking at the watch is not enough, you have to really run the headless again. The following set of ** is all completed in the terminal without entering any interactive interface ** - experience with your own hands what it feels like to use “Claude as a command line component”. Use minimal examples and don’t rely on complex projects you already have.
These steps require an Internet connection and will consume a certain amount of credit (each
-pcall is a real request). If the API is not accessible in China, open “Magic Internet” first.
The first step: the simplest -p call
Find any directory and type in the terminal (not in the claude session):
claude -p "用一句话说明 git rebase 和 git merge 的核心区别"Expectation: The terminal** directly prints out an answer and then exits**, without the chat interface popping up during the whole process. Seeing the results flash by and the prompt coming back = headless mode is running successfully.
Step 2: Connect it to the pipe and feed data into it
Create a small file as “input material” and pipe it to Claude:
printf 'def add(a, b):\n    return a - b\n' > buggy.py
cat buggy.py | claude -p "这段代码有个 bug,一句话指出来"Expected: Claude read the code fed into the pipe and replied something like “the function name is add but what it actually does is subtraction (a - b)”. Seeing it respond to “what you feed it” = the pipeline is open - it doesn’t use tools to read the file at all, the material is fed into its mouth by cat.
Step 3: For structured output, connect jq to get the fields
claude -p "用一句话介绍 Python 是什么语言" --output-format jsonExpectation: What is spit out this time is not plain text, but a big lump of JSON, which contains fields such as result (result text), session_id, total_cost_usd, etc. If jq is installed on your machine, try this again to get only the results:
claude -p "用一句话介绍 Python" --output-format json | jq -r '.result'Expected: This time only the clean result text is printed, and the outer JSON is stripped off by jq. **This is the standard way of doing “just the answer, not a bunch of metadata” in the script. **
Step 4: Use the exit code to determine success or failure
claude auth status
echo $?Expected: echo $? prints 0 if you are logged in; prints 1 if you are not logged in. **This number is the basis for the script to judge “should we go down?” - The claude auth status || ... in Section 05 is to catch it.
After running through these four steps, you will have gone through the complete headless link of “Single call → Pipe feeding → Structured output connected to jq → Exit code judgment”. **In the future, any script, CI, or scheduled task that I want to insert into Claude will essentially be the arrangement and combination of this set of parts. **
💡 Summary in one sentence: Four steps to get through headless - naked
-pto output results, pipelinecat | claude -pto feed,--output-format json | jqto get fields,auth status+$?to determine success or failure; these four pieces together are the foundation of all automation.
08 Summary
This article completely spreads out the claude line that you type every day - From “you can only type claude to enter the interface” to “all commands, flags, pipes, and exit codes are clear”.
Putting the core together to review:
| What do you want to do | What to use | Key points |
|---|---|---|
| Distinguish between commands and flags | Commands are sub-actions, flags are check boxes | update/mcp is a command, -p/--model is a flag |
| Start/Resume chat | claude / -c / -r | -c recognize the latest, -r restore by name, cure conversational amnesia |
| Output results directly without interaction | -p (--print) | Headless foundation, for scripts and pipelines |
| Temporarily cut model / set permissions | --model / --permission-mode | Override the default settings, just this time |
| Plug it into the command line | pipe + --output-format json + jq | cat ... | claude -p ... | jq streaming pipeline |
| Script determines success or failure | Exit code | 0 success, non-0 error, rely on $? or || to catch |
| Check a certain flag | Section 06 Cheat Sheet / Official Complete Collection | --help is incomplete, please refer to the official CLI reference |
You should be able to: Looking at any line of claude xxx --yyy, you can clearly understand “which is a command, which is a flag, and what each does”; if you want to continue the previous conversation, you know whether to use -c or -r; when you want to insert Claude into a script, you will use -p with pipes and --output-format json, and will also use the exit code to judge whether the step is successful; when encountering a symbol that you have never seen before, you know which table to check, and you also know that --help is unreliable and you have to read the official complete collection. **This set of command line skills is the watershed for you to truly transform Claude Code from “a chat window” into “a programmable part in the development workflow”. **
The person who just typed claude at the beginning, after learning -p and adding pipes, was able to write all the checks that were manually run every day into the script - It felt like Claude was suddenly invited from the “co-pilot” to the “assembly line”. This article just wants you to have this moment.
Next article 35 “Control and Mode” - In this article I repeatedly mentioned that --permission-mode can select plan, acceptEdits, bypassPermissions, but what is the specific temper of each mode, how many times do I ask you before taking action, and which mode should be switched to in certain scenes, I kept pressing it and did not expand it. The next article will break down these modes and explain how to use shortcut keys to switch between them in a session. Think about it: if Claude is also asked to modify a bunch of files, ** “ask you once every time I change a file” and “show it to you after I finish the modification”, the efficiency and security can be very different** - I will see you in the next article for the balance between this.
35 · Controls and Modes: The “mixer” in your hand during a conversation
Brothers, as we go along, we can type commands, write CLAUDE.md, and assign permissions. It should be pretty smooth.
But looking back, most of the time wasted in the first month was not about “not being able to use it”, but “not being able to control it” - the session was obviously running, but it could only do one thing: typing, entering, etc. Its output went astray, so I waited for it to finish. It started to modify the files as soon as it started, without stopping it. It should have been allowed to come up with a plan first, so I just let it in and made random changes.
To put it bluntly, Claude Code’s interactive interface is far more than just “input box + enter”. There is a whole set of “in-session controls” hidden underneath it: a button to switch its working mode, a button to pull it back from a deviation, a command to make it plan before it moves, and a switch to buy speed. These things Part 14 have exposed several shortcut keys, and Part 20 has talked about the permissions aspect, but “how to control it in the session” has never been centralized.
Let’s put it this way: The previous article taught “how to make Claude work”, this article teaches “how to control it in real time while working” - it’s like sitting in front of the mixing console, you don’t just press play, but you can touch every fader.
After reading this article, you will get:
- A panoramic view of “in-session control methods” - which key tube is interrupted, which key tube switches mode, and which key tube changes model, all at a glance
- The whole picture of
Shift+Tabcycle permission mode:auto/bypassPermissions/dontAskother than the default three levels, how to enter the cycle, who is ranked in front of whom (continued from Part 20, and will not repeat the permission rules) - Plan Mode is not just “a permission mode”, but also a set of workflows that “come up with a plan first, review it and then start it” - when should it be used and what are the options when approving it?
- What exactly do you buy in fast mode, is it worth it, and what is the difference between it and “effort level”
- How to open Vim editing mode, several of the most practical gestures, and a hands-on exercise that can be followed
01 First build a general framework: the switches you can flip in the session are divided into three categories
Before memorizing the shortcut keys, first group the “in-session control methods” into categories in your mind. **They are not a bunch of scattered keys, but three different things. ** Once the categories are clearly distinguished, there will be hooks when you remember them later.
**Analogy: Sitting in front of a mixing console. ** The densely packed faders and knobs on the big stage in the recording studio look deceptive, but they actually fall into three categories: one controls “the volume of this channel” (faders), one controls “record the entire section or stop it, and return to which section to re-record” (transport button), and the other controls “how to adjust the tone” (equalization knob). You don’t have to memorize everything, but you need to know “where to stretch your hand if you want to do this.” The same goes for Claude Code’s session control, with each of the three types of switches taking charge.
Falling to Claude Code, the three categories are:
- Control “its autonomy” - that is, the permission mode:
Shift+Tabcycles throughdefault/acceptEdits/planwith one click, and decides whether it will ask you before taking action (Part 20). - Control “the process it runs” - Interruption and redirection:
Escpresses the brake,Esc Escreverses the vehicle,Ctrl+Cinterrupts or clears input,Ctrl+Bthrows the task to the background. - Regardless of “how it responds” - Model and speed:
Option+Pchanges the model,Option+Tswitches extended thinking,/fastswitches fast mode.
Put a table side by side and compare it to immediately understand what each is doing:
| What you want to do | Reach out and press | Which category |
|---|---|---|
| Ask less/ask more before asking it to do it | Shift+Tab loop mode | Manage autonomy |
| It went astray, stop and try again | Esc | Manage the process |
| Return the entire conversation to the previous point | Esc Esc (when the input box is empty) | Manage the process |
| Interrupt current operation / clear input box | Ctrl+C | Manage process |
| Leave long commands in the background and continue doing other things | Ctrl+B | Manage the process |
| Temporarily change the model to answer | Option+P (Win/Linux is Alt+P) | Tube response |
| Let it think for a while / Don’t think for too long | Option+T | Tube response |
| Pay for faster Opus | /fast or Option+O (macOS) / Alt+O (Win/Linux) | Tube response |
⚠️ macOS users should read this first: Most of the shortcut keys starting with
Option+(Option+P,Option+T,Option+O) on Mac need to match the terminal’s Option to the Meta key before they take effect - iTerm2 sets the left/right Option to “Esc+” in “Settings → Profile → Keys”, and Apple Terminal in “Settings → Profile → Keyboard” and check “Use Option as Meta Key”. There is an official exception: starting from v2.1.132,Option+T(switch extended thinking) can be used on Mac without configuration.
You don’t need to memorize this list, but you need to be aware of “which category this thing belongs to” - don’t press Esc if you want to “leave it to ask less questions”, don’t press Shift+Tab if you want to “stop”, once you understand it clearly, you won’t scratch it randomly.
💡 One sentence summary: The control methods in the session are divided into three categories - Autonomy (
Shift+Tab), Process (Esc/Ctrl+C/Ctrl+B), and Response (Option+P//fast); It doesn’t matter if you can’t remember the specific keys, first remember “Which category should you stretch your hand to if you want to do this?”
02 Pipe process: Esc is to brake, Esc Esc is to reverse
Among the three categories, the one you should master first is the “process management” category, because it saves the situation the most frequently. Pick out the most commonly used ones and explain “when to press and what happens when you press it” one by one.
Esc: It went off track, braked
Esc does one thing: Stop whatever Claude is currently doing - whether it’s generating an answer or turning a tool halfway. Press it and it will stop immediately, then return the cursor to you, waiting for you to speak again.
The key is this reassuring official statement:
Stop the current response or tool call midway so you can redirect. Claude retains the work completed so far.
In other words, Esc is not “undo”, but “pause + return the steering wheel”. The parts it has already completed (such as the files it has read and half of the functions it has written) are retained. You just interrupt its next actions and change the direction to let it continue.
The most commonly used scenario of using Esc: I asked it to change a small function, but it misunderstood it and started to change five or six files. If you stupidly wait for it to finish running before correcting it, you will waste several minutes of its output; the good thing to do is - as soon as you see that the direction is wrong, immediately Esc, and then add “Stop, I only need to change the login.js function, don’t touch anything else”, it will turn around on the spot. This key needs to be pressed dozens of times a day under heavy use.
Esc Esc: Return the conversation to the previous point
Double-click Esc, there are two behaviors, depending on whether there are words in your input box:
- There are words in the input box: Double
Escto clear it, and save this draft to the history. Press↑to recall it later. - Input box is empty: Double
Escopens Back Menu - allowing you to resume from the previous node in the conversation, or summarize the code and conversation.
The second type is “reverse”: return the entire conversation to a previous state. This area belongs to the category of checkpoints. Part 37 specifically talks about it. Here you first remember an action: Double-click Esc when the input box is empty to open the “Return to the previous save point” menu. Commonly used when reworking - I feel like “the last few rounds have brought things into a ditch”, double Esc to return to the clean point before the ditch, and start again.
Ctrl+C and Ctrl+D: Stop pressing the escape key blindly
These two newbies are most likely to get mixed up, and they are nailed down one by one:
Ctrl+C: If there is an operation running, interrupt it; if there is no operation running, press clear the input box for the first time, press it again to exit Claude Code.Ctrl+D: Directly exit the Claude Code session (EOF signal).
There is an easy pitfall here: if you want to clear half of the words in the input box, press Ctrl+C. If there is no response, try again - and the session will be exited directly. The reason is that the second Ctrl+C on the empty input box is to exit. Therefore, it is better to use Ctrl+U (to delete from the cursor to the beginning of the line) or simply Esc Esc to clear the input box, rather than double-clicking Ctrl+C.
Ctrl+B: Long commands will be lost in the background, don’t wait.
This save is also fierce. When Claude runs a command that takes a long time (install dependencies, run a build, start a development server), you don’t have to wait - Press Ctrl+B to throw it to the background, Claude immediately has his hands free to respond to your new command, that command continues to run in the background, the output is written to a file, and it reads it back when needed.
Brothers who use tmux, please note: tmux’s own prefix key is also
Ctrl+B, so in tmux you have to press it twice to throw the task into the background. This point is easy to get fooled, so keep it in mind.
| Key | Function of one sentence | The most easily misremembered point |
|---|---|---|
Esc | Call stop + redirect, completed retention | Not undo, but pause and return the steering wheel |
Esc Esc | Open the back menu when the input box is empty | Clear the draft when there are words, the behavior is different |
Ctrl+C | Interrupt operation / clear input / press again to exit | The empty input box will be exited after the second click |
Ctrl+D | Exit the session directly | Exit immediately, don’t use it as the interrupt key |
Ctrl+B | Long commands are lost in the background | Double click in tmux |
💡 In one sentence:
Escis for braking (pull back if you go off track),EscEscis for reversing (return to the previous point),Ctrl+Cdon’t click repeatedly (the second click on an empty frame will go back), useCtrl+B` for long commands to lose the background - these four times will become muscle memory, and you will never wait or accidentally back out during the session.
03 Take Autonomy: The Complete Version of Shift+Tab Loop Pattern
The spectrum of “from strict to loose” of the permission mode has been explained thoroughly in Part 20 - default asks step by step, acceptEdits changes the code without asking, plan just looks at it, auto has a classifier to cover the whole story, bypassPermissions is completely naked, dontAsk Pre-approval only. **This section will not go over what they are (I forgot to go back and read Part 20). I will only add one thing that was not covered in detail in that article: how to turn the Shift+Tab loop. **
First, hold the basic disk upright: Press Shift+Tab casually during the session to rotate between the three modes:
default → acceptEdits → plan → (再按回到 default)Which gear is the current one? See the status bar. For example, if you switch to acceptEdits, the status bar will light up ⏵⏵ accept edits on. This is the default cycle, only these three gears.
Where did auto, bypassPermissions, and dontAsk go? **They are not in the default loop and will be “inserted” only if conditions are met or parameters are provided. ** The official rules are written in detail, I will translate them into adult language for you:
auto: When your account meets all the requirements for auto mode, it will appear in the loop. The first time you cycle through it, an “opt-in” prompt will pop up, and you click to agree before it is officially included. If you select “No, don’t ask again,” it will be kicked out of the cycle.bypassPermissions(skip all checks): This only appears if you have started it with--permission-mode bypassPermissions,--dangerously-skip-permissionsor--allow-dangerously-skip-permissions. Note that the--allow-variant just adds it to the loop but does not activate it immediately.dontAsk(only recognize pre-approval): Never enter the loop, can only be specified at startup with--permission-mode dontAsk.
On a more detailed note, the official has clarified the queue-jumping position to prevent you from discovering that the order is wrong halfway through:
Enabled optional modes are inserted after
plan,bypassPermissionsfirst,autolast. If you enable both, you will loop throughbypassPermissionson the way toauto.
Translate this sentence into your actual experience when pressing keys: Assuming you enable both, the circle of Shift+Tab looks like this——
default → acceptEdits → plan → bypassPermissions → auto → (回到 default)auto always comes last, bypassPermissions comes before it. Remember this sequence, and you will know how many more clicks to get to the gear you want, no need to turn around.
The recommended practical habits are consistent with Part 20 - Most of the time it is only in the default three gears Shift+Tab manual switching: When taking on an unfamiliar project, switch to plan first and let it read through the plan. If you trust the direction, switch to acceptEdits and let it change. After the change, think more carefully before switching back. default. bypassPermissions should only be opened with startup parameters in the isolated container, and do not get caught in the daily loop - this red line has been drawn in Part 20, so I won’t repeat it.
💡 In one sentence summary:
Shift+Tabby default only switches to the third gear ofdefault/acceptEdits/plan;auto/bypassPermissionsmust meet the conditions or have startup parameters before being listed. The order is “afterplan,bypassPermissionsis in front, andautois at the bottom” - remember this ranking, and you will know it after a few clicks.
04 Plan Mode: It’s more than just a mode, it’s a set of workflows that “plan first and act later”
In the previous section, plan was mentioned as a file in the loop, but it deserves a separate section - **Because the real value of Plan Mode is not that “it is a read-only mode”, but in the complete workflow behind it that “come out with the plan first, and then you review it and then start.” ** This is the most frequently used control method and the most recommended for beginners to develop habits as soon as possible.
Analogy: The director yells, “Go through the play first.” ** Before the official start of filming, the director often asks the actors to rehearse first - go through all the moves, lines, and rhythm, but ** without turning on the camera or consuming film. When it looked like there was no problem, he shouted “Turn on the camera, take real shots”. Plan Mode is this “walk-through” link: Claude goes through the whole thing in his mind, reads documents, does research, and writes out a plan of “I plan to change it like this”, but does not actually touch a word of your source code; you nod after reading it, and then the “actual shooting” starts to change.
The official definition of its behavior is very clear:
Plan mode tells Claude to study and propose changes without making changes. Claude reads files, runs shell commands to explore, and writes plans, but does not edit your source code.
How to enter and how to exit
There are two ways to enter Plan Mode:
Shift+Tabloops toplan- controls the entire session until you switch away.- Add
/planbefore a single prompt - only let this prompt be in planning mode, suitable for “I want to see the plan first for this matter”.
/plan 帮我把用户登录从 session 改成 JWT,先别动,告诉我你打算怎么改Want to quit without approving the plan? Just press Shift+Tab again to cycle.
The plan is out, what are the options for approval?
This is the most “workflow” step in Plan Mode, and it is also the place where novices are most likely to be confused. When Claude writes the plan, it will stop and ask you “What to do next?” The options given are roughly the following:
- Approve and start in auto mode - You trust the direction and let it run its course.
- Approve and accept edits - Switch to
acceptEdits, no questions asked for code changes, but dangerous commands will still be stopped. - Approve and manually review each edit - Go back to the
defaultkind of step-by-step confirmation. - Continue planning and give feedback - The plan is not good enough. If you give your opinion, it will change the plan.
**Do you understand? Approving the plan is equivalent to “selecting which permission mode will be used next.” ** It exits Plan Mode, switches the session directly to the one you selected, and then starts taking action. This is why Plan Mode is not an isolated level, but the hub that connects the entire process of “exploration → coming up with a plan → choosing autonomy → taking action”.
There are also two official details, which are quite practical:
Ctrl+GDirectly edit the plan: The plan has been written, but you want to make two changes by yourself (for example, “Delete this step and change the order”). PressCtrl+Gto open it in your default text editor. After making the changes, let Claude follow suit.- Approval will automatically name the session: Unless you have already named it with
--nameor/rename, when the plan is approved, it will automatically name the session according to the content of the plan, making it easier to find/resumelater.
A typical usage
To put it bluntly, when taking on any unfamiliar project, the first thing to do is to switch to Plan Mode and let it read through it and come up with a plan. ** For example, if you take over an old code left by someone else, it contains tens of thousands of lines and you don’t understand anything. Directly Shift+Tab to plan and say “Read through this project and tell me the overall structure and where you suggest changes to start.” I read it around and listed the structure + modification suggestions. Only after reading it can I put it in with confidence. **If you just acceptEdits and let it be modified blindly from the beginning, it will most likely be a disaster. ** It is strongly recommended that you develop this habit as soon as possible.
💡 To sum up in one sentence: Plan Mode is “walk the show first and then shoot” - it only researches and produces plans without leaving the source code; when the plan is approved, the next permission mode will be selected by the way (auto/acceptEdits/manual review), and
Ctrl+Gcan also allow you to change the plan yourself. When taking on unfamiliar projects, run/planfirst, which is much more stable.
05 Fast mode: What you spend money on is speed, not quality.
⚠️ Research Preview Features, Subject to Change: fast mode is currently a research preview version, and features, pricing, and availability may be adjusted at any time; and requires Claude Code v2.1.36 or higher.
After talking about “how to control direction”, let’s talk about a switch to “control speed” - fast mode. Let’s put the most easily misunderstood point right first:
**Quick mode does not change to a stronger model, it changes the “running method” of the same Opus. ** The official said it very directly:
Quick mode is not a different model. It uses Claude Opus, but with a different API configuration that prioritizes speed over cost efficiency. You get the same quality and functionality, just more responsive.
How much faster and more expensive is it? Official figures: Up to 2.5 times faster, at the cost of each token being more expensive. It is only supported on Opus 4.8 / 4.7 / 4.6, and cannot be used with Sonnet and Haiku (⚠️ The fast mode of Opus 4.6 has been deprecated, it is recommended to use 4.7 or 4.8).
How to open
Just one command:
/fastType /fast and press Tab to toggle it on or off. After opening:
- If you are using another model at the time, it will automatically switch to Opus.
- You will see the prompt
Fast mode ON, and a small↯icon pops up next to the prompt box. - You can check whether it is currently on or off by pressing
/fastat any time.
There is a counter-intuitive point to keep in mind: after turning off fast mode, if you are still parked on Opus, the model will not automatically switch back to your original one. If you want to change to another model, you have to /model yourself.
Is it worth it? It depends on whether you are short of speed or money.
When will it open? The official judgment is consistent with the actual experience - It depends on whether the “delay” or the “cost” of your task is more serious:
| Scene | Turn on fast mode? | Why |
|---|---|---|
| Fix bugs in real time, iterate quickly, and meet deadlines | ✅ Open | You are waiting for it, even a second of delay will be uncomfortable, speed is priority |
| Long-term autonomous tasks, batch processing, CI/CD | ❌ Not open | No one is watching, it doesn’t matter if you go slow, save money first |
| Cost-sensitive work | ❌ Not open | Each token is more expensive, and it hurts to pile up |
There is also a key detail to save money, which the official has repeatedly emphasized, but it is also easy to ignore:
For best cost efficiency, enable Quick Mode at the beginning of a session rather than switching mid-conversation.
Why? Because when you open quick mode for the first time, you have to pay a complete quick mode input fee for the “entire conversation context”. The longer the conversation is delayed, the more expensive it will be. So if you want to open it, just start it. Don’t wait until you have been chatting for a long time and the context is full of information before you remember to open it. It’s easy to pay for it this way - if you go fast in the middle of a long conversation, the bill will be significantly higher than expected.
Not to be confused with “effort level”
Finally, a common confusion is clarified: fast mode ≠ adjust effort level. Both of these affect speed, but in completely different ways:
| Settings | What is done | Side effects |
|---|---|---|
| Quick Mode | Same model quality, lower latency | More expensive |
| Lower the effort level | Let it think less and work faster | The quality of complex tasks may be reduced |
In a word: **Quick mode does not sacrifice quality and only costs more; lowering the effort level means less thinking and may sacrifice quality. ** The two can also be used together - “Quick Mode + Low Effort Level” for simple tasks to maximize speed.
⚠️ Extra note for subscribers: For Pro/Max/Team/Enterprise subscribers, the quick mode** only takes the “usage quota” and is not included in the subscription rate limit**. From the first token, they will be billed separately according to the quick mode rate. In other words, it costs extra and is not a free subscription. Know before you drive.
💡 To summarize in one sentence: Fast mode buys ** the speed of the same Opus (up to 2.5 times), but the price is more expensive**;
/fastswitch, if you want to enable it, enable it at the beginning of the session (it is more expensive to enable it in the middle); enable it when you are in a hurry, and disable it when running a long task, don’t confuse it with “adjusting effort level”.
06 Vim editing mode: add veteran gestures to your input box
The last control method serves “how do you edit the words you type” - Vim mode. **If you have never used Vim at all, you can skip this section at a glance. It will not affect your use of Claude Code; but if you are a Vim veteran, the input experience will be much smoother if you open it. **
The input box of Claude Code is an ordinary text box by default (you can type and move with the arrow keys). When Vim mode is turned on, it has Vim’s “two states”:
- INSERT mode: Just like a normal input box, typing is typing.
- NORMAL (normal) mode: The keys are no longer characters, but “commands” -
h/j/k/lmoves the cursor,dddeletes a line,wjumps to the next word,0jumps to the beginning of the line,$jumps to the end of the line… Vim’s full set has been moved over.
How to open
Through the /config menu, find “Editor mode” and switch to vim. After opening:
- Press
Escto enter NORMAL mode (the key is a command at this time). - Press
i/a/oand wait to return to INSERT mode and start typing.
The following are the most commonly used ones in the input box, for those of you who have never had any experience with them:
| What to do by pressing | in NORMAL mode |
|---|---|
dd | Delete the entire line (for example, if you want to rewrite this prompt) |
cw | Change the current word |
0 / $ | Jump to the beginning / end of the line |
u | Undo the changes just made |
i / a | Start inserting typing before/after the cursor |
There is a detail that Vim veterans will like: **In NORMAL mode, if the cursor is already at the top or bottom of the input and cannot move up/down, then pressing j/k or the arrow keys will browse the command history. ** It is equivalent to “moving” and “turning history” seamlessly.
To be honest, this mode is purely the “icing on the cake”. Heavy users of Vim are really happy to open it and edit long prompts; but for many novices, there is no need to touch it at all - an ordinary text box with the shortcut keys in Section 02 (Ctrl+U to delete to the beginning of the line, Ctrl+W to delete words) is enough. **So: If it’s a Vim party, just start it. If it’s not, don’t bother. This is not a required course. **
💡 In one sentence: Vim mode equips the input box with NORMAL/INSERT states and a full set of Vim gestures,
/config→ editor mode is turned on; Vim veterans can use it easily, and pure novices can skip it without affecting any functions.
07 Take action: Connect this set of control methods and run it again
You can’t remember it just by watching it. Below is a 5-minute exercise that does not rely on any complex projects**. String together several core control methods in this article and press them again. Each step will give you “what to expect to see”. You can follow it and verify it.
Just find an empty directory, start claude, and then:
Step one: practice Shift+Tab to switch modes and stare at the status bar
After starting, press Shift+Tab several times in succession and keep your eyes on the status bar**.
Expected: The status bar text changes cyclically between three levels - when switching to
acceptEdits, it will display something like⏵⏵ accept edits on, when switching toplan, the plan mode prompt will be displayed, and when it is turned around, it will return to the default (the mode prompt in the status bar disappears or displays the default). Make sure you can identify which gear you are currently in by relying on the status bar.
Step 2: Enter Plan Mode and let it come up with a plan (but don’t actually move it)
Shift+Tab Switch to plan, and then enter a request that will trigger it to “want to do something”:
在当前目录创建一个 hello.txt,里面写一行 "hi from claude"Expectation: It will not actually create the file, but will give you a description of “I am going to do this”, and finally stop and ask you how to continue (approve and accept editing / manual review / continue planning…). Confirm that there is no
hello.txtin the directory at the moment - This is Plan Mode “only acting but not filming”.
Step 3: Approve the plan and watch it change mode
From the options it gives, select “Approve and accept edits” (or manually review that).
Expected: It exits Plan Mode, the status bar switches to the mode you selected (if you select accept edits,
accept edits onis displayed), and thenhello.txtis actually created. Confirm that there are files in the directory now, and the mode has changed fromplanto the one you selected when approving - see with your own eyes “Approval plan = incidentally selected permission mode”.
Step 4: Practice Esc to stop
Give it a slightly longer task (such as “read all the files in this directory one by one and summarize”), and when it runs, click Esc**.
Expected: It stops on the spot, returns control to you, and returns the cursor to the input box. The parts it has already done (such as files it has read) are retained. You can then add a new command to redirect it. Confirm that
Escis “suspend the return” and not “report an error and crash”.
Step 5 (optional): Check the quick mode switch
Type /fast and press Tab to see the prompts.
Expected: If your account supports it, you will see
Fast mode ONand the↯icon next to the prompt box; click/fastto turn it off. If your account/plan does not support it or does not have a usage quota, you will see a prompt similar to “fast mode is not available” - This step is to “experience it if it can be turned on, and it is normal if it cannot be turned on”, there is no need to force it.
After completing these five steps, you will have experienced all the core control methods in this article with your own hands. Newbies especially need to go through the second and third steps - “It doesn’t take action in Plan Mode, only takes action after approval and switches mode.” Reading the document ten times is not as good as clicking it once by yourself**.
💡 To sum up in one sentence: Follow these five steps and press
Shift+Tabto switch modes, Plan Mode to produce plans and approves,Escto stop, and/fastswitch** and click them together**. Check each step against “what you expect to see”; especially the second and third steps, experience with your own hands that “Plan Mode is only for acting, and approval is for actual shooting, and the mode is switched by the way.”
08 Summary
This article talks about “the console in your hand after the session has started”. Part 20 gives you the reins of permissions, but this article gives you a full set of joysticks.
Putting the core together to review:
| What you want to do | Control methods | Key points in one sentence |
|---|---|---|
| Ask less/more questions before letting it do it | Shift+Tab loop mode | Default three levels, auto/bypass will be listed only if the conditions are met, auto will be at the bottom |
| It went off track and called Stop Redirect | Esc | Pause and return the steering wheel, completed reservation |
| Go back to the previous point in the conversation | Esc Esc (when the box is empty) | Open the back menu, see Part 37 |
| Interrupt/Clear input/Exit | Ctrl+C / Ctrl+D | Click Ctrl+C for the second time in the empty box to exit, don’t click repeatedly |
| Long commands are lost in the background | Ctrl+B | Press twice in tmux |
| Come up with a plan before taking action | Plan Mode (/plan) | Just go through the motions without actually filming, and select the permission mode when approving |
| Spend money to buy faster Opus | /fast | Same quality, more expensive, need to start a session |
| Vim gesture editing input | /config → Editor mode | Vim party icing on the cake, novices can skip |
You should now be able to: Control Claude with ease in a running session - Shift+Tab to switch to the appropriate autonomy level, Esc to pull it back if it strays, use Plan Mode to let unfamiliar projects “come up with a plan first and you will review it before starting”, use /fast to get the speed as needed, and Vim users can also use familiar gestures to edit prompts. **To put it bluntly, you have upgraded from “only typing and pressing Enter and waiting” to “holding the joystick throughout the entire process and being able to control it at any time.” **
The entire fifth group of “System Configuration and Optimization” has reached this point. Configuration files, output styles, hooks, CLI flags, controls and modes have all been laid out. You already have a systematic grasp of “how to configure and how to control” Claude Code.
Next article 36 “Slash Commands”, turn your attention back to the most inconspicuous little symbol that is used every day - /. In this article, you have typed several slash commands such as /plan, /fast, and /config, but how many of them are there? Can you create your own / command? Think about it: Those fixed processes that you type by hand every day, if you can press them into a / and shout them out with one click, how much work will be saved - See you in the next article.
36 · Slash Commands: A / brings up all of Claude’s shortcut actions
Many people did something stupid when they first started using Claude Code.
Every time I want to clear the conversation and reopen it, I always do this: first exit claude with Ctrl+C, then type claude again in the terminal to start it, wait for it to reload the project and read CLAUDE.md again - ten seconds before and after. After working like this for a week or two, I still felt like “restart, this is how it should be”. Until I looked through the official documentation and came across a /clear command, which said “Open a new conversation with an empty context.” Only then did I realize: **It turned out that just typing three characters in the session was enough, and the two weeks of restarting were all in vain. **
What’s even more embarrassing is the back. /compact can compress long conversations and continue chatting, /model can directly change the model without restarting, /init can generate CLAUDE.md with one click… All of these are things that either have been done manually before, or you don’t know how to do them at all. These commands have always been lying in the / menu. They are all listed with a slash, but none of them have been turned over.
I tell you this embarrassing thing to prevent you from taking detours: The slash command is not an “advanced gameplay”, it is the most basic control panel of Claude Code. Most of the “meta-operations” you want to do in the session-not to let it write code, but to train it itself-the entrance is in this /. This article will first show you the built-in batches, and then teach you how to engrave those reminders you type by hand every day into your own one-click commands.
After reading this article, you will get:
- Explain in one sentence what the slash command is and why it only counts at the beginning of the message
- A list of built-in commands “grouped by usage scenarios” (
/help,/clear,/compact,/init,/model,/agents,/mcp,/memory, etc.), no need to memorize them, check them on demand - Complete steps to write a slash command yourself: drop markdown under
.claude/commands/, add frontmatter, and use$ARGUMENTSto pass parameters - An advanced way to play: let the command fill in “live data” such as
git diffbefore sending it to Claude - What’s going on with the namespace? Why do the commands provided by the plug-in never conflict with yours?
- What is the relationship between slash command and Skill (in a word: slash command is the “active shouting” usage of Skill, see Chapter 26 for details)
- A practical example that can be followed and gives the expected output: carve out a
/explaincommand with parameters in 5 minutes and verify it
01 First understand: What is the slash command? Why does it only count at the beginning?
Let me give you the conclusion first: The slash command is the “control command” you type in the Claude session - not to tell Claude to let it work, but to directly command the Claude Code program itself: cut the model, clear the context, run a process, and open a panel.
If you think back to the previous thirty or so articles, there have always been two types of approaches when dealing with Claude. One is serious needs: “Help me reconstruct this function” “What’s going on with this error report” - this is for the model to listen to. The other is meta-operations: “Clear the dialogue and reopen it”, “Change to a more economical model”, “Generate a project description” - these should not rely on “talking” to the model, but should have a direct switch. The slash command is the unified entry for this batch of switches.
**Analogy: The row of printed buttons on a TV remote control. ** When you watch TV, you change the channel, adjust the volume, switch the source, and open the menu - you don’t shout at the TV, “Please help me turn up the volume.” You press the corresponding button on the remote control. Each button does a certain thing, and it takes effect immediately when pressed. No explanation is needed and there is no misunderstanding. The slash command is the row of buttons in Claude Code: /clear is the screen clear key, /model is the source switch key, and /help is the menu key - pressing it executes a fixed action hard-coded in the program, which is different from “asking the model for help”.
The official positioning of it is very clear:
Command controls Claude Code from within the session. They provide a way to quickly switch models, manage permissions, clear context, run workflows, and more.
Here is the most common mistake for newbies, which the official emphasized - the slash command is only recognized at the beginning of the message:
Commands are only recognized at the beginning of the message. The text after the command name is passed to it as arguments.
To put it bluntly: you have to make / the first character of the message in order for it to be treated as a command. If you write “Help me see what /clear does”, the /clear in the middle of the sentence will not be executed and will only be sent to Claude as ordinary text. This design makes sense - otherwise when you were discussing the command itself with Claude, the conversation was cleared as soon as /clear was mentioned, which would be a mess. **Remember: the command starts with the command, followed by the parameters. **
Fall into a few moments that you will actually encounter, and experience when to press this row of “buttons”:
- While chatting, I found that the model is not strong enough - No need to exit and restart, just open
/modeland replace it with a stronger one on the spot, and the conversation will continue. - After completing one task, I want to change to a new one - hit
/clearto wipe the table clean, and the old dialogue can be retrieved by/resume. - I just cloned an unfamiliar project, and I want Claude to understand it first - hit
/init, it will read the code and spit out a copy ofCLAUDE.mdfor you.
What these things have in common is that they are not “letting Claude write code”, but “training Claude Code itself” - this is the home of the slash command.
So how do you know what commands are available? The easiest way is to type /** in the session, and the menu will pop up immediately, listing all the commands you can currently use; then type a few more letters, and it will filter in real time. Official words:
Type
/to see every command available to you, or type/followed by a letter to filter.
💡 To summarize in one sentence: The slash command is Claude Code’s “control button row” - it is in charge of the program itself (cutting the model, clearing the context, and running the process), not assigning work to the model; It only counts at the beginning of the message. Type a
/to see all available commands.
02 Built-in command list: No need to memorize it, just click “What step are you doing” to check
There are dozens of built-in commands. If you really have to memorize them one by one, it’s just because you can’t live with yourself. Claude Code’s official documentation itself is organized according to the “typical process of a session” - whichever step you are at, you should naturally use. I organized the most commonly used ones into several groups according to this idea, and just look for the line “What do you want to do now”?
Let me make one thing clear first: among these dozens, most of them are “built-in commands” (the behavior is hard-coded in the CLI, and when pressed to execute the fixed logic), there are also a few marked Skill in the document - that is “bundled Skill”, which is essentially a reminder to Claude to use his own tools to complete the arrangement (such as /code-review, /debug). There are also a few marked Workflow - those are multi-subagent parallel dynamic processes (such as /batch, /deep-research). The calling experience is the same, but the bottom layer is more complicated. Just know that there is such a thing. You can use / to add names to all three types, there is no difference in usage, the difference is only in how to implement the underlying layer - this detail was discussed in Part 26 when talking about Skill, so I won’t expand on it here.
Group 1: Just entered a project, used to set the scene
| Command | What does it do | When do you use it |
|---|---|---|
/init | Generate a starting CLAUDE.md for the project | Start working in a warehouse for the first time (see Part 12 for details) |
/memory | Edit the CLAUDE.md memory file and manage automatic memory | /init and then want to fine-tune the description (see Chapter 25 for details) |
/mcp | Manage MCP server connection and authorization | When connecting to external services (see Chapter 22 for details) |
/agents | Subagent configuration | When a special agent is required (see Chapter 23 for details) |
/permissions | Permission rules governing “allow/ask/deny” | Decide whether it will ask you before taking action (see Part 20 for details) |
This group basically follows a fixed routine when entering a new project: first let it read the code through /init, spit out a draft of CLAUDE.md, and then go into /memory to correct a few of its guesses. No need to write the instructions by hand from scratch - The first time I used this process, I was really surprised.
The second group: halfway through the work, used to adjust the status
| Command | What does it do | When do you use it |
|---|---|---|
/model | Switch the model and save it as the default for new sessions | Want to change to a stronger or more economical model |
/clear | Open a new conversation with an empty context (the old one can be retrieved with /resume) | Change to a new task and clean up the table |
/compact | Compress the current conversation into a summary and free up the context to continue chatting | The conversation is too long and the workbench is almost full (see Part 19 for details) |
/context | Draw the current context occupation into a colored grid | Want to see “Who has occupied my workbench” |
/plan | Enter plan mode directly | Let it come up with a plan before making major changes |
/clear and /compact are the two most easily confused. The pitfall in the beginning is that “clear” and “compress” are not distinguished. In one sentence: If you want to change to a new and unrelated task, use /clear (erase the whole table and restart), use /compact (organize the scratch paper into a page of bullet points and continue working on the same task but the chat is too long). Chapter 19 specifically dismantled this pair, here you just need to remember “clear when changing tasks, and compact when continuing tasks”.
The third group: used for inspection before handing over the work
| Command | What to do |
|---|---|
/diff | Open an interactive diff viewer to view uncommitted changes |
/review | Review a PR in the current session |
/security-review | Specially scans for security vulnerabilities in changes to the current branch |
/code-review | Review the diff to find bugs and simplifications. You can add --fix to make changes directly |
Group 4: A few things you will use sooner or later in miscellaneous items
| Command | What to do |
|---|---|
/help | Display help and available commands |
/config | Open the settings interface and adjust themes, models, output styles, etc. |
/doctor | Check your installation and configuration, press f to let it repair automatically |
/resume | Restore an old conversation by ID or name, or open the selector |
/skills | List all currently available Skills |
/rewind | Roll back dialogue and/or code to a checkpoint (next post) |
**Note: Not every command will be displayed for everyone. ** The official statement is clear - “Availability depends on your platform, package and environment.” For example,
/desktoponly appears on macOS and Windows when logging in with a Claude subscription, and/upgradeonly appears on the Pro and Max plans. The menu you see when you type/is the complete set of items that your machine and account can actually use at the moment - use it as the standard, and don’t take the commands in other people’s screenshots to be more accurate.
I haven’t included all of these four groups (the official summary table has dozens of lines), but they cover 90% of your daily scenarios. For the rest, whatever you want to do temporarily, type / and add a few letters to filter it. It is much more practical than flipping through documents.
💡 One sentence summary: Don’t memorize the built-in commands by heart, **check them by “which step you are at” - setting up (
/init/memory/mcp/agents), working (/model/clear/compact/context), before delivery (/diff/review/code-review), miscellaneous (/help/doctor/resume); the menu is the real complete set of your machine, you can see it by pressing/.
03 Carve a command yourself: .claude/commands/ and just throw it in markdown
The built-in commands are all recognized. What really makes the slash command useful is that you can create it yourself.
Why make it yourself? Think about the “repetitive work” in your daily dealings with Claude - every time he asks him to submit code, he is told the same set of rules, every time he reviews a PR, he makes the same opening statement, and every time he explains the code, he emphasizes “speaking in human terms and not using jargon.” **When you type the same paragraph prompt for the fifth time, it is a signal: it is time to engrave it into a command. **
**Analogy: Program a “learning button” on the remote control. ** There is a “learning button” on the better universal remote control - you record a series of common operations (power on → switch to HDMI2 → adjust the volume to 15), and then press this button, and the whole series of actions will be completed automatically, without having to press them one by one. The custom slash command is this learning key: **You “record” a prompt that needs to be typed repeatedly into a command, and then type the command name, and the prompt will be automatically sent out. **
How to make it? It’s so simple that you may not believe it—throw a markdown file in the .claude/commands/ directory, and the file name is the command name. The official documentation is very clear:
Files in
.claude/commands/deploy.md… create/deploy.
In other words, if you create a .claude/commands/commit.md and write your set of submission rules in it, it will automatically become the /commit command**. The file name (without the .md suffix) is the name of the command you typed, with zero configuration.
Take the simplest example. You create a new .claude/commands/review.md and write in it:
请审查我当前未提交的改动,重点看三件事:
1. 有没有缺失的错误处理
2. 有没有写死的配置值(端口、密钥、路径)
3. 有没有该补而没补的测试

用中文逐条列出,每条标明在哪个文件。
After saving, you type /review in the session, and Claude receives the entire prompt above - which is equivalent to you typing that paragraph word for word, but you only typed seven characters.
Here is a key distinction about “where to put it”, which is in the same vein as when we talked about MCP and Skills earlier:
| Where to put | Command scope | Enter git |
|---|---|---|
Project level .claude/commands/ | Only the current project | Enter, can be used by the whole team |
Personal ~/.claude/commands/ | All your projects | No entry, Your private |
The logic is exactly the same as Skill: This command is exclusive to this project and you want collaborators to also use it (such as the release process of this project), put it at the project level and submit it to the repository; If it is only for you and is common across projects (such as your personal code interpretation habits), put it at the personal level ~/.claude/commands/. There are several cross-project small commands in ~/.claude/commands/ all year round. They are available in every project you switch to. This is much less troublesome than reconfiguring each project.
💡 To summarize in one sentence: Custom commands are to “record repeated prompts into one click” - Put a markdown under
.claude/commands/, the file name is the command name, zero configuration; put it at the project level and share it with the whole team, put it in~/.claude/commands/for personal use across projects.
04 Adding materials to the command: frontmatter and $ARGUMENTS passing parameters
The /review in the previous section can already be used, but it has an obvious limitation: the content is hard-coded and parameters cannot be passed. You can’t tell it “just check this one file `src/auth.ts” - it will check all changes every time. To make the command more flexible, two things need to be added: frontmatter and parameter placeholders.
Use $ARGUMENTS to catch the parameters you pass
Let’s deal with passing parameters first. Claude Code provides a placeholder $ARGUMENTS - Everything you type after the command name will be replaced in the position of this placeholder. The example given in the official documentation is the most intuitive:
Fix GitHub issue $ARGUMENTS following our coding standards.

1. Read the issue description
2. Understand the requirements
3. Implement the fix
The official words explain its effect:
When you run
/fix-issue 123, Claude receives “Fix GitHub issue 123 following our coding standards…”
Do you understand? If you type /fix-issue 123, that 123 will be stuffed into the $ARGUMENTS position. A command template, the parameters can be changed as you want - This is where the command is really useful.
There is also a thoughtful tip: Officially, if you pass parameters but do not write
$ARGUMENTS** in the command at all, Claude Code will automatically appendARGUMENTS: <your input>to the end of the command content, “so that Claude can still see what you entered.” So even if you forget to write the placeholder, the parameters will not be lost out of thin air.
Want to pass several parameters? Use $0 $1 to get by position
What if a command has to pass multiple parameters? For example, “Move the SearchBar component from React to Vue”, there are three independent values. The official method of writing getting parameters by position is $ARGUMENTS[N], or the shorter $N (both start from 0):
Migrate the $0 component from $1 to $2.
Preserve all existing behavior and tests.
You run /migrate-component SearchBar React Vue, $0 is SearchBar, $1 is React, $2 is Vue. Note a pitfall: Officially, these position-based parameters use “shell-style quoting” - so multiple word values must be enclosed in quotes to be counted as one parameter. For example, /my-cmd "hello world" second, $0 is the complete hello world, otherwise it will be separated by spaces. (And $ARGUMENTS is not affected, it will always be the entire string of original text you entered.)
Use frontmatter to control the behavior of commands
It’s not enough to just transfer parameters. Your /deploy and /commit commands have side effects - you definitely don’t want Claude to deploy it for you on his own “seeing that your code seems to be written”. This depends on frontmatter to take care of it.
frontmatter is a piece of YAML configuration written between the two --- at the beginning of the file (this concept was seen when talking about SKILL.md in Chapter 26, Custom command files support exactly the same frontmatter). The two fields you should know most:
---
description: 把当前改动暂存并提交
disable-model-invocation: true
---

把当前改动提交,commit 信息用中文、前缀按 feat/fix/docs:

1. 先跑测试套件
2. git add 改动
3. 用规范的中文信息提交description: A sentence describing what this command does. Claude relies on it to judge “whether to use this command automatically”, so it is recommended to write **.disable-model-invocation: true: Set totrue, only you can shout this command manually, Claude will not automatically trigger it. This should be added to any tasks that have side effects and that you want to take advantage of by yourself (deployment, submission, sending messages).
This leads to a realization that you must understand, lest it scare you by “acting without authorization” - Your custom command defaults to “can be adjusted by both you and Claude”. When you type /commit, you adjust it manually; but because you wrote description, Claude may adjust it by itself when it thinks it is suitable. This is a reflection of the fact that the slash command and Skill are “the same thing” (see Part 26 for details) - if you are afraid that it will automatically do things randomly, add disable-model-invocation: true to lock it into pure manual operation**. /commit should be the first command of this kind, otherwise it will almost commit unfinished changes for you a few times.
| The effect you want | What frontmatter to add |
|---|---|
| The command has side effects, I can only shout it myself | disable-model-invocation: true |
| Let Claude know when to use this command | Write the description |
| Limit what tools can be used while it is active without asking every time | allowed-tools: Bash(git add *) Bash(git commit *) |
💡 One sentence summary:
$ARGUMENTSreceives all the input after the command name,$0/$1is taken by position (multi-word values must be quoted);descriptionin frontmatter lets Claude know when to use it,disable-model-invocation: trueis locked to pure manual - the latter must be added to commands with side effects.
05 An advanced step: let the command bring its own “field data”
At this point, your command can already pass parameters, but there is a more ruthless trick - let the command fill in the field data yourself before sending it to Claude. This trick is called dynamic context injection (dynamic context injection), and it is the most underestimated ability of custom command files.
Let’s first talk about what it solves. Your /review command says “Please review my currently uncommitted changes” - but when Claude gets this sentence, he has to run git diff himself to know what you have changed**. Can the diff be plugged in before it reads the command? able.
Writing is to write !`command` in the command - an exclamation mark and backtick to enclose a shell command. The official documentation makes it very clear:
!`<command>`syntax runs a shell command before sending content to Claude. The command output replaces the placeholders, so Claude receives the actual data, not the command itself.
For example, upgrade /review. You write this in .claude/commands/review.md:
## 当前改动

!`git diff HEAD`

## 说明

审查上面这段改动,重点看缺失的错误处理、写死的配置值、该补的测试。用中文逐条列出。
What happens with the line !`git diff HEAD`? The official execution sequence is as follows:
- Claude Code first ran
git diff HEAD - Replace the output of this command to that line
- What Claude sees is the complete prompt of your real diff at the moment
In other words, what Claude got was not “Run a diff”, but “This is the user’s change: … (real content), please review”**. This is pre-processing and is not performed by Claude himself - it only sees the final filled-in results. After adding this line to /review, you can obviously feel that it “enters the state as soon as it comes up”, and there is no need to go around and check for changes first.
A few use the details that you need to know before to avoid stepping into pitfalls:
- The exclamation point must be at the beginning of the line or immediately after a blank to take effect. If it is written as
KEY=!cmd“ immediately after other characters, it will be treated as ordinary text and the command will not run. - Multi-line commands Do not use inline writing. Instead, use a fence code block starting with
```!(one command per line). - This ability can be turned off: there is
disableSkillShellExecutionin the settings. After setting it totrue, these commands will not be executed and will be replaced with an English prompt[shell command execution disabled by policy]. It’s most useful in a team’s hosting setup - to prevent someone from inserting a random shell command into the command line of a shared repository.
By the way, a tip for auto-completion: add a line of argument-hint (such as argument-hint: [issue-number]) to frontmatter. When you type the command name, the auto-completion will prompt “What parameters should be passed to this command?”. After you have too many commands, this tip can help you reduce the need to flip through documents.
💡 Summary in one sentence:
!`command`allows the slash command** to fill in the on-site data (such asgit diff) before sending it to Claude**. Claude gets the real data instead of “running a command”; the exclamation mark should be used at the beginning of the line and in multiple lines. Blocks and teams can usedisableSkillShellExecutionto disable it with one click.
06 Namespace: Why do the commands provided by the plug-in never have the same name?
After creating more commands yourself and installing several plug-ins (each plug-in also comes with a bunch of commands), a practical question arises: Will it cause name recognition? ** For example, if you write a /review, and there is also a /review in a certain plug-in installed, which one will run?
Let’s talk about the kind that can collide and the kind that can’t. The key depends on where the command comes from.
Between your own commands: priority determines the outcome
If your own .claude/commands/ file has the same name as the Skill in .claude/skills/ - the official rules are clear:
If a skill and a command share the same name, the skill takes precedence.
In other words, you have .claude/commands/deploy.md and another .claude/skills/deploy/SKILL.md. When you type /deploy, you will get that Skill**. Just remember this “Skill with the same name wins”. Usually you rarely create two skills with the same name on purpose.
Commands provided by the plug-in: relying on namespace, there will be no collision at all
The plug-in’s processing method is more thorough-it doesn’t compete with you for your name at all. Official words:
Plugin skills use the
plugin-name:skill-namenamespace so they cannot conflict with other levels.
**Analogy: Add company prefix to people with the same name in the mobile phone address book. ** There are two “Zhang Wei” in your address book, how will you save them? Most of the notes are “Zhang Wei (Sequoia)” and “Zhang Wei (Gaochun)” - add a prefix and the two will never mix up again. This is what the namespace does: the review in the plug-in my-plugin is called /my-plugin:review in your case, and the previous plug-in name is the “company prefix”. So even if you have a /review yourself, one of the two commands has a prefix and the other does not.
This is why when talking about plug-ins in Chapter 24, it was said that “plug-in skills will never conflict with your name” - it relies on this set of plug-in name: command name' namespace**. Install multiple plug-ins, each with review, they are /plugin-a:review, /plugin-b:review`, each has its own name.
There is another type of command with “double underline” that you may encounter: MCP server exposed prompt. Officially, they use the format /mcp__<server>__<prompt>, which is dynamically discovered from the connected server. Don’t be confused when you see a /mcp__github__xxx - that’s a command that comes with an MCP server (see Part 22 for details).
💡 To summarize in one sentence: “Skill beats command” when your own command has the same name; plug-in commands rely on
plugin name: command namenamespace, which is inherently non-colliding; the MCP server command is in the/mcp__<server>__<prompt>format - three sources, recognize the prefix and there will be no confusion.
07 Slash command and Skill: What is the relationship? Explain it in one sentence
You may be mumbling after learning this: **slash command, Skill, why do these two sound so similar? What is the difference between what I just wrote in .claude/commands/ and the SKILL.md written in .claude/skills/ in Part 26? **
This is a good question, and it’s also the easiest knot for novices to get around. Let me explain it to you in one sentence:
**Custom slash command has been officially merged into the Skill system. ** Your
.claude/commands/file can still be used, but Skill is an “upgraded version” - it can have supporting files, can be automatically triggered by Claude, describes advanced context, and is loaded when long documents are called (rather than fully preloaded).
The official words are very direct:
Custom commands have been merged into skills. Files in
.claude/commands/deploy.mdand skills in.claude/skills/deploy/SKILL.mdwill both create/deployand work the same way.
So these two are not two opposite things at all, but two ways of writing the same ability. To put it another way: “slash command” is more like a “calling method” (you type / to actively shout), and Skill is the “body” that is called. The table in Part 26 has already explained the positioning of Skill, slash command, and Subagent. Here I only add a comparison of “How to choose between two writing methods for the same thing”:
| Your needs | Use old-fashioned commands (.claude/commands/xx.md) | Use skills (.claude/skills/xx/SKILL.md) |
|---|---|---|
| Just a reminder, shout it manually | ✅ That’s enough, the easiest thing to do | It’s okay, but it’s a waste of time |
| Want to bring templates/scripts/sample files | ❌ Can’t bring them | ✅ It is a directory that can hold a bunch of supporting files |
| I want Claude to “automatically adjust when needed” | You can also write description, but Skill is designed for this | ✅ Home |
| Want to fill in long reference materials without taking up context | ❌ Unable to support attached files (templates/scripts/long documents) | ✅ Supports attached file directories, long documents are referenced on demand in SKILL.md, and are not automatically loaded in full when called |
A rule of thumb: For small tasks such as a prompt and manual shouting (like that /review), the old-fashioned .claude/commands/ and a markdown are the easiest, don’t bother; once you find that “you want to add a template to it” “you want to stuff a long document but don’t take up the context” “you want it to judge whether it should be used” - you should upgrade to Skill (see Chapters 26 and 27 for how to write it) Chapter 28, if you are too lazy to write it by hand, use the skill-creator in Chapter 28).
To put it bluntly, the “custom slash command” you learned in this article is the lightest entrance to the Skill system**. First use it to smooth the “one-click prompt” thing. You need more skills. Just upgrade to Skill smoothly - the official documentation clearly states that “your existing files will continue to work.” .claude/commands/ is an officially supported writing method and has no intention of being abandoned.
💡 One sentence summary: The custom slash command** has been merged into the Skill system** - the old
.claude/commands/is the lightest entry (pure one-paragraph prompt, manual shout), and is upgraded to a Skill when supporting files/automatic triggers/progressive disclosure are required; The two create commands with the same name and their usage is exactly the same.
08 Hands-on: Carve a /explain command with parameters in 5 minutes
You can’t remember it just by watching it. The following will help you carve a slash command from scratch that is really usable and can also pass parameters - a /explain that “explains the code/reports errors in vernacular”. The whole process does not rely on any complex environment, and can be run through an empty directory.
Step 1: Create a command directory (Mac/Linux)
In any of your project directories (if not, leave mkdir empty), create the .claude/commands/ folder:
mkdir -p .claude/commandsWindows users: Manually create .claude\commands\ two-layer folders in the project root directory.
Expected: There is an empty directory .claude/commands/ under the project.
Step 2: Write command file
Using your favorite editor, save the following content as .claude/commands/explain.md:
---
description: 用大白话解释一段代码或一个报错。当用户想搞懂某段代码或某个报错时使用。
---

请用初学者能懂的大白话,解释下面这个东西:

$ARGUMENTS

要求:
1. 先一句话说它整体在干啥
2. 再逐行 / 逐段拆开说清楚
3. 如果是报错,指出最可能的原因和怎么改
4. 少堆术语,能用生活类比就用
Note two things: The --- at the beginning frames the frontmatter, and the description lets Claude know what this command does; the $ARGUMENTS in the text is used to catch the code/error you pass in later.
Expected: There is an explain.md in .claude/commands/.
Step 3: Start Claude and confirm that the command has been recognized
claudeAfter entering, type /** (just hit the slash, don’t enter), and look at the pop-up menu:
Expectation: You can see /explain in the menu, next to the description you wrote. **See it in the menu = command has been loaded correctly. ** If you don’t see it, it’s probably because the file is not saved in the right place - make sure it is in .claude/commands/explain.md and not in another path.
Step 4: Call it with parameters
Now actually use it - type the command name, followed by what you want to explain (this string will be stuffed into $ARGUMENTS):
/explain print(sum([1,2,3]) / len([1,2,3]))Expected: Claude received your complete prompt, in which $ARGUMENTS has been replaced by print(sum([1,2,3]) / len([1,2,3])). It will follow the four steps you wrote - first describe the whole in one sentence (calculate the average of these three numbers), then break it down into sections, use fewer terms, and use analogies if possible. **You only type the command name and a piece of code, and the entire set of “explanation requirements” will automatically take effect. This is the power of $ARGUMENTS. **
Step 5: Try again with different parameters
The same command, replaced with an explanation of the error:
/explain ZeroDivisionError: division by zeroExpectation: /explain is also triggered, but this time $ARGUMENTS becomes the error message. Claude will focus on the “most likely cause and how to change it” (the divisor is 0) as required in Article 3. **A template, the parameters can be changed as you wish - this is where custom commands are better than hand-typing prompts. **
After running through these five steps, you will have personally verified the three core things of the custom slash command - “The file name is the command name”, “frontmatter plus description” and “$ARGUMENTS parameters”. Any command you want to engrave in the future will essentially follow this process, which is nothing more than changing the file name, changing the segment prompt, and adding the frontmatter field as needed.
💡 To summarize in one sentence: There are only three steps to engrave a command -
.claude/commands/, put a markdown file (the file name is the command name), adddescription, and use$ARGUMENTSto leave parameter bits; type/to see if it enters the menu, and call it twice with different parameters. Verifying it by hand is more practical than memorizing ten documents.
09 Summary
This article opens up the slash command for you from “the entrance you type every day but don’t understand” - It is the control panel of Claude Code, from the dozens of built-in switches to the one-click process you carved yourself, it is all behind a /.
Let’s review the core points together:
| Things you want to know | Answers | Key points |
|---|---|---|
| What is the slash command | Control instructions of Claude Code | Manage the program itself, not dispatch; only count at the beginning of the message |
| How to remember the built-in commands | Group search according to usage scenarios | Setting up / working / before delivery / miscellaneous; type / to see the real complete set |
| How to create your own commands | .claude/commands/ put markdown | The file name is the command name; project-level sharing / personal-level cross-project |
| How to pass parameters to the command | $ARGUMENTS / $0 $1 | The input after the command name is automatically replaced; multi-word values must be quoted |
| How to make the command bring live data | !`Command` Dynamic injection | Fill in the real output such as git diff before sending to Claude |
| How to control command behavior | frontmatter | description tells when to use, disable-model-invocation locks manually |
| Will commands collide with names | Each of the three sources has its own rules | Skill wins command, plug-ins rely on namespace, MCP /mcp__ prefix |
| What is the relationship with Skill | Merged into Skill system | Command is the lightest entry, if you need more skills, upgrade to Skill |
You should now be able to: Type a / to understand the menu, click “Which step are you at” to find the built-in command to use; engrave the prompts you type repeatedly into a command under .claude/commands/, use $ARGUMENTS to let it receive parameters, and use frontmatter to control its behavior; distinguish who wins when the command has the same name, and why the plug-in command does not collide; and understand the slash command and Skill It’s basically the same thing - the former is the lightest entry point to the latter, and you can upgrade it at any time if you get it right**.
Looking back at the “Restart Dafa” in the first two weeks - In the final analysis, I just didn’t turn over the / menu. After this article, if you want to do something with Claude Code itself, your first reaction should be to make a slash first to see if there is a ready-made switch; if not, just spend two minutes to carve one. **This habit can help you save a lot of wasted time. **
Next article 37 “Checkpoints” - I only mentioned the /rewind at the end of this article, and the next article will specifically dismantle it. Claude changed the code and the direction went wrong. What should I do? **You can’t just manually git reset or stare blankly every time. ** The next article teaches you how to use Claude Code’s built-in checkpoint mechanism to “rewind” the code and dialogue back to a clean state, just like reading a game save. Think about it: if there was an automatic “save point” every time you changed a few steps, wouldn’t you be much bolder in trial and error?
37 · Checkpoints: a safety net that can be rewinded at any time
It is said that checkpoints are your “regret medicine”. With it, you can free up your hands and let Claude do a big job - **To be honest, use it as git, and sooner or later it will overturn. **
Imagine a person who has just started using Claude Code. Hearing that there is such a thing as /rewind, he feels relaxed and lets Claude change more than a dozen files in one go, and in the middle he also runs a few rm and mv to clean directories. After changing to the third round, I found that the direction was wrong, so I calmly /rewind and wanted to jump back - ** As a result, part of the code was returned, but none of the files deleted by rm were returned**. I was confused on the spot: “Didn’t you say it can be revoked?”
It can be undone, but what is undone is the files that Claude changed using the editing tool, not the traces left on your disk by running the bash command, nor the permanent history like git. Checkpoint is a “session-level local undo”, which is fast, automatic, and can exit the conversation together; but it has clear boundaries, and it cannot control things that cross the boundaries.
This article does two things: one is to make the checkpoint “auto-archive + rewind” set so that you can operate it with your eyes closed; the other is to nail its boundaries - what can be returned, what cannot be returned, when should you rely on it, and when must you use git. **Clear the boundary, it is the real safety net, otherwise it is a safety net that will lie to you. **
After reading this article, you will get:
- Explain in one sentence what a checkpoint is and when it will automatically save it for you (no need for you to do it manually)
- What are the two opening methods of
/rewindand “double-click Esc in the empty input box”, and what are the options in the back menu? - A comparison table of “can roll back vs. cannot roll back” - code and dialogue can be rolled back, but bash side effects and external state cannot be rolled back
- Clear division of labor between checkpoints and git: when to use which one, why not replace one with the other
- A practical operation that can be followed and gives the expected output: make a “correction” with your own hands and then rewind it
01 What is a checkpoint: It secretly takes a snapshot before you speak.
Let me give the conclusion first: **The checkpoint is the “pre-editing snapshot” that Claude Code automatically takes of your code - every time you send a prompt, it takes a picture; if you want to return it afterwards, just say /rewind to jump back. **
Chapter 07 You have seen it once, and you know that you can /rewind to correct mistakes. This article goes deeper. First, think back to the rhythm of your work with Claude: you issue a command → it “thinks → does → sees”, rotates around and changes a few files → you see the results and then sends the next sentence (this cycle was discussed in Part 03). **What the checkpoint does is to take a picture of the code status at that time before each instruction is implemented. **
**Analogy: Timeline playback on a video recorder (DVR). ** On your set-top box that can play back, the program is recorded continuously, but it has a “chapter mark” at each program switch. If you want to re-read a certain paragraph, you don’t need to fast forward from the beginning. You can just drag it to the chapter mark and skip it. Checkpoints are like this: **Every prompt you send is a chapter mark on the timeline; /rewind is to drag the entire tape back to a certain mark and start again. ** The only difference is that - the video recorder playback is “watching”, while the checkpoint playback really returns the code and dialogue to that moment, allowing you to re-record in a different way.
The official positioning of it is as follows:
When you work with Claude, checkpointing automatically captures the state of your code before each edit. This safety net allows you to execute ambitious, large-scale tasks with confidence because you can always return to the previous state of your code.
Note that word - automatic. This is the most exciting thing about checkpoints, and the biggest physical difference between it and git: **You don’t have to do anything. ** In git, you have to remember git commit. If you forget to submit, it will not be saved; the checkpoint is that Claude silently takes pictures from behind, so you don’t have to worry about “did I save it?”
The official list lists the four most typical uses, and I will accompany each with a picture that you will actually encounter:
- Explore alternative plans: If you are not satisfied with the implementation of A, return to the starting point and try plan B again. The starting point is intact, and there is no need to worry about “you can’t go back if you try it wrong.”
- Recover from Error: After it changes a certain file, the test hangs instead, and you are too lazy to manually go back line by line - return to the previous checkpoint, clean.
- Iterative function: Let Claude rewrite the entire module to practice. After writing, he found that it was not as good as before - jump back to before rewriting, and it would be as if it had never happened. Dare to give it a try.
- Release context space: There has been a long discussion about debugging. I want to keep the previous setting instructions, but want to throw away the trial and error in the middle - this is where “summary” is used (Section 03).
Let’s understand what these four categories have in common: They are all “I want to rush forward boldly, but I am afraid that I will not be able to come back if I rush too hard.”—The checkpoint is to eliminate this “fear”.
💡 Summary in one sentence: The checkpoint is a code snapshot that Claude automatically takes before each edit. Every time you send a prompt, there is an additional “chapter mark”. Afterwards, you can rewind the code and conversation back to that moment with
/rewind- the whole process is automatic, no need for you to save manually.
02 When, where and how long will it be saved?
Since the checkpoint is “automatic”, you have to know its automatic rules - when to take pictures, where to put the things you take, and how long they can be kept. These three points are clearly stated in the official document, and I will explain them to you one by one.
Trigger timing: one checkpoint for each prompt
The rule is just one sentence: **Every time you send a prompt (prompt), Claude Code creates a new checkpoint. **Official original words:
Each user prompt creates a new checkpoint.
Therefore, the density of “chapter marks” on the timeline follows the rhythm of your speaking - if you send ten commands, there will be ten points to jump back to. This also explains why what is listed in the back menu later is every prompt you have sent in this session: each prompt is both a “start of action” and a “save point to go back to.”
Draw this rhythm and you will understand at a glance how the checkpoints “fall” along your dialogue:
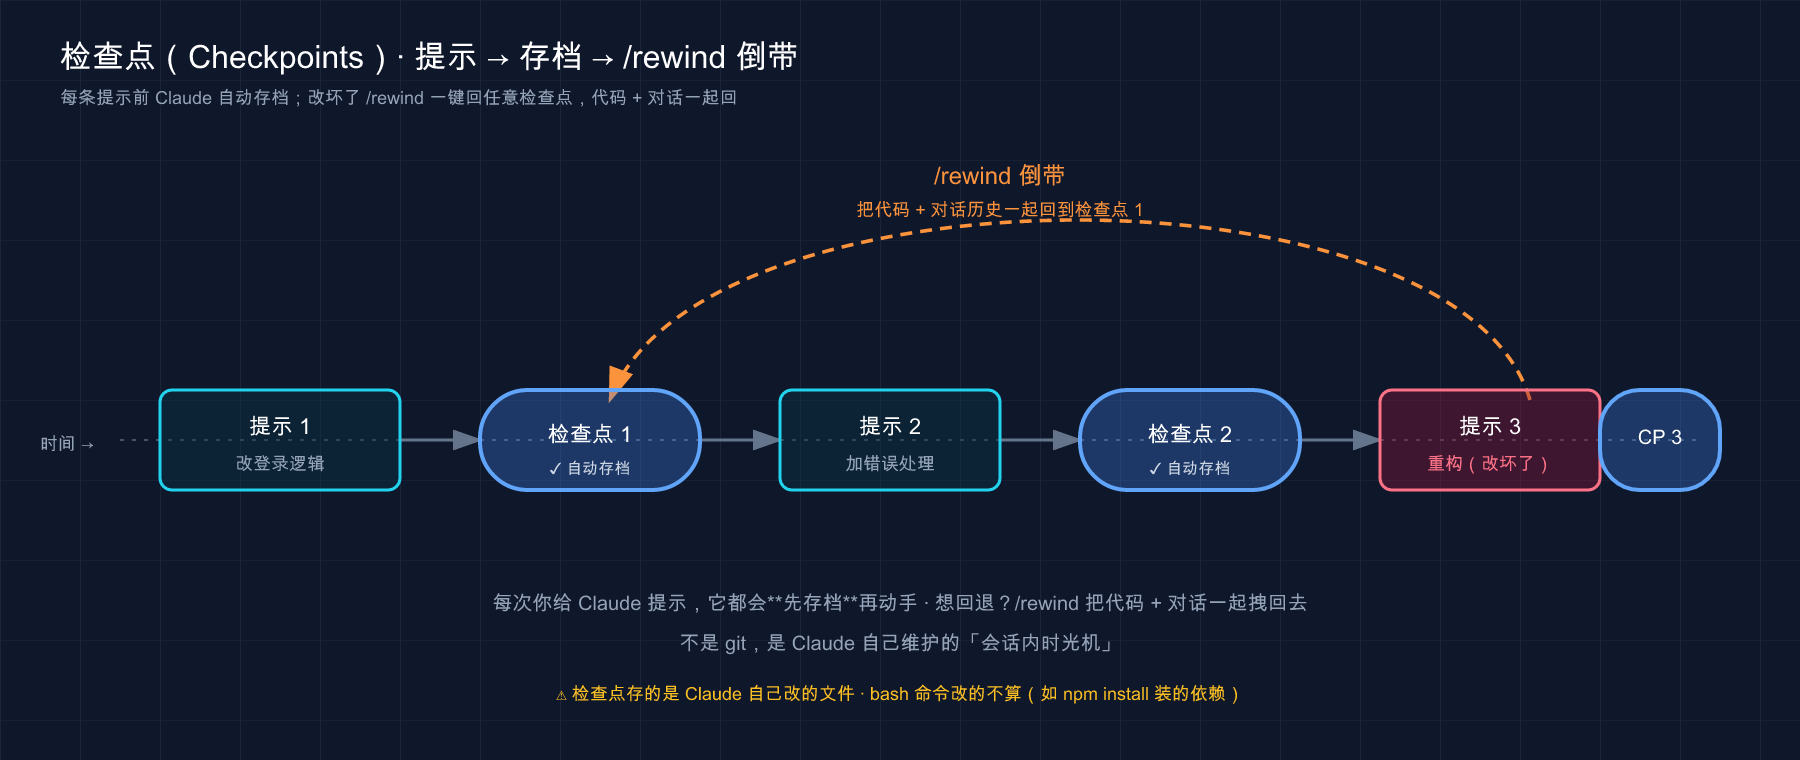
What this picture shows is: every time you send a prompt, Claude will drop a checkpoint (blue node) before taking action; when he changes to prompt 3 and finds that he messed up, he can jump back to checkpoint 1 along the dotted line with /rewind, and undo the changes in prompts 2 and 3 together with the dialogue - this is the essence of its “rewinding at any time”.
Where to save: Hidden in your ~/.claude
The snapshot is not stored in the memory out of thin air, it falls on the disk. It is named in the official document (claude-directory.md):
file-history/<session>/- Pre-edit snapshot of files changed by Claude, used for checkpoint recovery.
In other words, the “pre-edit snapshot” of each session exists in the directory ~/.claude/file-history/<session>/. You don’t need to touch it, but knowing where it is has two benefits: first, you understand that the checkpoint is really supported by physical files, not metaphysics; second, if you are curious about how much space Claude Code occupies on your machine one day, you will know that it is under its control.
Cross-session: Close and reopen, the archive is still there
Since the disk is lost, there is a very practical feature - checkpoints are not lost across sessions. Official words:
Checkpoints persist between sessions, so you can access them in a restored conversation.
What does it mean? If you exit halfway through Ctrl+D today, use claude --resume (or --continue) to continue the session tomorrow. The previous series of checkpoints are still, and you can still /rewind to rewind to a certain point yesterday. It is easy to mistakenly think that /rewind is only valid in the currently open window, and will be cleared when closed - but in fact, if you continue a session three days ago, the old prompts in the rollback menu can still jump, it is really stored on the disk and follows the session. Therefore, when it comes to “archiving”, it can even handle “shut down and restart”, and is only controlled by the cleanupPeriodDays period.
How long to stay: Default 30 days, adjustable
Checkpoints will not be kept forever, and the official has set up an automatic cleanup:
Automatic cleanup after 30 days (configurable).
Which switch is this “configurable” exactly? It is cleanupPeriodDays in settings.json (Part 31 specifically talks about the user-level/project-level configuration of settings.json). The official settings.md says that it defaults to 30 days to clear records of inactive sessions, at least 1 day, and setting it to 0 will be directly rejected - this value also controls the retention of checkpoint snapshots. **Advice to noobs: Don’t touch it. ** The default value is sufficient. The progress you really need to save for a long time should be handed over to git (detailed in Section 05 below), instead of counting on checkpoints to save it for you for half a year.
One day I was looking through ~/.claude to clear space, and noticed the file-history directory, and then I realized: **It turns out that the pile of “regret medicine” in /rewind every day is silently carried here. ** Normally you don’t feel its existence at all, which is exactly the benefit of “automatic”.
Put these three points together into a table:
| Dimensions | Rules | What you have to do |
|---|---|---|
| When to save | Automatically create a checkpoint every time a prompt is sent | No need to do anything, just talk normally |
| Where it exists | ~/.claude/file-history/<session>/ | No need to touch it, just know where it is |
| Cross-session | Durable across sessions, can still be used after resuming the conversation | Can be found even after closing and reopening |
| How long to keep | By default, it will be cleaned with cleanupPeriodDays | Don’t change it; leave long-term progress to git |
💡 One sentence summary: Checkpoints save one for each prompt and fall in
~/.claude/file-history/, are not lost across sessions, and are cleaned bycleanupPeriodDaysby default; you only need to know this set of rules and do not need to operate - it is fully automatic.
03 How to rewind: /rewind, double-click Esc, and the back menu
Now that I know it exists silently in the background, I now learn how to bring it out and use it. **There are only two entrances, remember them: /rewind command, or double-click Esc in the empty input box. **
Two entrances
First, type the slash command in the session:
/rewindThe second, faster - When the input box is empty, double-click Esc:
(输入框空着,连按 Esc Esc)Both of these will pop up the same rewind menu. Official words:
Run
/rewind, or pressEsctwice when prompted for an empty input, to open the rewind menu.
There is a pitfall here that was covered in Chapter 14, and I have to type it on the blackboard again:
If the prompt contains text, double
Escwill clear it instead of opening the menu. The cleared text is saved to your input history, so you can recall it by pressingUpafter you complete the backtracking menu.
Translated into adult language: **When there are words in the input box, double-clicking Esc will “clear this word”, not open a menu. ** To rewind, make sure the input box is empty. It’s easy for a novice to stumble here - after typing half a sentence and wanting to regret it, he presses Esc frantically, and the menu disappears and the menu doesn’t appear, leaving him confused. **Remember: Clear first, then Esc Esc. ** If you are not sure, just type /rewind, it will not choose whether the input box is empty or not.
What are you selecting in the back menu?
A menu pops up, it lists every prompt you have sent in this session - that is, the string of “chapter markers” on the timeline. You first choose a “point you want to return to”, and then choose “how to return”. This second step is key because there is more than one way to retreat.
I will translate the several operations given by the official one by one:
| Menu options | What it does | When to select |
|---|---|---|
| Restore code and dialogue | Code and dialogue together return to that point | I want to start over the whole round: as if those few sentences never happened |
| Resume conversation | Only exit the conversation, the code remains as it is | I want to keep the modified code, but the conversation got messed up and I want to reorganize the conversation |
| Restore Code | Only code changes will be rolled back, Conversations will be retained | If the code is broken, it needs to be rolled back, but the previous discussion still wants to be used |
| Summary from here | Condens this and subsequent conversations into a summary** | Cut off a side discussion that goes astray and keep the complete details of the previous part |
| Go here to summarize | Condensate this previous conversation into a summary** | Get rid of the lengthy preliminary preparation and retain the complete details of recent work |
| Forget it | Don’t move anything, return to the list | Wrong click / Just look and go |
For the two options in the middle, “only withdraw half”, novices often mutter, “Why should we withdraw separately?” Let’s take a real-life scenario each:
- Only “Restore Code”: You and Claude talked back and forth for five rounds and finally settled on a plan. He followed the changes, but the code broke. You want to get rid of this pile of bad code, but you can’t lose the ins and outs of those five rounds of discussions (reexplaining it again is too tiring) - then choose “Restore Code”, the code will return to before the change, the dialogue remains intact, and let it be rewritten with the original understanding.
- Only “Restore Conversation”: On the other hand, you are quite satisfied with the code it modified and want to keep it, but this round of conversation was distorted by a few irrelevant questions you asked, and the more we talked, the more chaotic it became. Select “Restore Conversation” to return the conversation to the point before it was distorted. The code remains as it is, and you can reorganize your thoughts and continue to command.
Do you understand - “Restore Code/Restore Dialog” are two knobs for you to disassemble and refine, you don’t have to exit “Code and Dialog” together. The most commonly used method here is actually “recovering the code”: there is no problem with the solution, but Claude wrote it crookedly. It is much easier to return the code and let it be rewritten than to describe the requirements from scratch.
**The easiest thing to confuse here is that “recovery” and “summary” are completely different things. ** Don’t think they do similar jobs just because they are put in the same menu:
- restore = True Rewind State: Returns code, dialogue, or both to the selected point. This is “turning back time”.
- summarize = leave the file on disk alone, just compress one side of the conversation into an AI-generated summary, freeing up context space. This is “organizing the desktop”, not rewinding.
The official made this difference very straightforward:
Restore options restore state: they undo code changes, conversation history, or both. The summary option compresses a portion of a conversation into an AI-generated summary without changing the file on disk.
Did you see that - The “summary” is actually the exact version of /compact in Part 19. /compact compresses the entire conversation, and the “summarize from here/to here” here allows you to pick a point and only compress one side of it: use “summarize from here” to cut off stray branches, and flatten the lengthy opening with “summarize here”. The official themselves also compared it this way:
This is similar to
/compact, but more targeted: instead of summarizing the entire conversation, you choose which side of the selected message to compress.
There is another thoughtful detail: After selecting “Restore Conversation” or “Summary from Here”, the original prompt of the selected message will be automatically filled back into the input box, and you can change it and resend it - which is equivalent to “go back to before you said this sentence, giving you a chance to say it again.” (Selecting “Go to summary here” is different: it leaves you at the end of the conversation, with the input box empty.)
Two little problems that newbies often get stuck on
“The back menu pops up and is empty / there are few options to choose from”——Normal. The menu lists prompts you have sent in this session. You have just opened the business and only sent one or two sentences, so naturally you don’t have many points to withdraw. Checkpoints are “accumulated as you work”. The more points you get, the more points you can withdraw.
“I chose the wrong point with my slider and went too far. Can I go back again?” - Don’t panic yet. The checkpoint itself is remained on the disk across sessions (as mentioned in Section 02), and will not disappear just because you /rewind once; those points in the menu are usually still there, and you can open the rollback menu again and select a further point to adjust. However, the specific menu behavior of each version may be different. The most stable rule is the old rule: before doing high-risk work, make a git commit - the “permanent history” of git will always be your last line of defense when you have no retreat (more details in the next section).
💡 To summarize in one sentence: There are two rewind entrances -
/rewindor empty input box double-click Esc; in the menu, first select “Which point to return to” and then “How to exit”. “Restore” is a true retreat state, and “Summary” only presses the context without leaving the file. Don’t mix the two; don’t panic if you retreat too far, the real guarantee is togit commitin advance.
04 Where is the boundary: What can be rolled back, and what cannot be rolled back alive or dead?
This section is the key point of the whole story, and the mistake that happened at the beginning happened here. **The checkpoint is not a universal undo key, it only focuses on one type of thing - the direct changes made by Claude using the “File Editing Tool”. ** It won’t be able to control anything that crosses this line.
**The analogy is still that video recorder: it only recorded “the picture on the screen”, not “what really happened in your living room”. ** If you rewind it, the scene will be back, but the cup of coffee you just spilled in the living room, the letter you sent, the deleted file - ** things that have happened in the real world cannot be brought back by rewinding. ** The checkpoint takes a “snapshot of the code file”. It can’t control the back and forth of the file content; it can’t control the real movement caused by Claude running the command in your system.
The official list of what can be returned and what cannot be returned is clearly listed in the “Restrictions” section. I have compiled a comparison table - You must remember this table:
| Category | Can you reply | Why |
|---|---|---|
| File content modified by Claude using the editing tool | ✅ Can be restored | This is exactly the object of the checkpoint tracking |
| Conversation History | ✅ Able to return | The back menu can restore the conversation individually/together |
Claude ran the bash command to change the files (rm / mv / cp…) | ❌ Cannot come back | bash changes are not tracked |
| Files that have not been edited in the current session | ❌ Cannot go back | Only track files that have been touched by this session |
| Files you manually changed outside Claude Code | ❌ Cannot be rolled back | External changes are not captured |
| Things changed by other concurrent sessions | ❌ Can’t come back | Same as above, unless the same file happens to be moved |
| Side effects that have been sent (sending requests, deleting database rows, pushing…) | ❌ Cannot come back | External state, checkpoint is completely out of reach |
What should be engraved in your mind the most is the first two clauses “can’t come back”, which the official specially mentioned for emphasis. Let’s look at the bash command first:
Checkpointing does not track files modified by bash commands. For example, if Claude Code runs
rm file.txt,mv old.txt new.txt,cp source.txt dest.txt…these file modifications cannot be undone through backtracking. Only direct file edits made through Claude’s file editing tools are tracked.
This is the pitfall at the beginning - Claude deleted the file using rm, not modified it using an editing tool, so /rewind cannot save it. ** Emphasis: ** “Claude changes files” is divided into two types - using its editing tools to change (tracked, can be rolled back), and using bash commands (not tracked, cannot be rolled back). In your eyes, both of these are “It touched my files”, but in the eyes of checkpoints, they are completely different.
How can you tell on the spot which type it is traveling on? Look at the tool call name it types when working (I mentioned in Part 14 that Ctrl+O can expand detailed transcription):
- See editing tools such as
Edit,Write,MultiEditmoving - they are tracked by checkpoints and can be saved by changing/rewind. - See
Bashrunning commands such asrm,mv,cp,>(redirect override) - not tracked, modified/rewindcannot be saved.
These two are clearly written in the transcription. Develop the habit of “looking at the tool name when letting it do high-risk tasks”, and you will be able to judge before it actually does it: If this step is messed up, do I still have the /rewind medicine to regret it? If it is judged as “no”, just git commit first.
Look at the “External Changes” item again:
Checkpointing only tracks files edited during the current session. Manual changes you make to files outside of Claude Code and edits from other concurrent sessions are generally not captured unless they happen to modify the same file as the current session.
This means: If you modified it yourself using another editor, or opened another Claude Code session, the checkpoint of this session will not be recognized.
There is a rule worth following here: **Any time Claude is asked to do work with irreversible side effects such as “delete files, move directories, change databases, and send requests,” never expect /rewind to take care of it - what should be git commit should be submitted first, and what should be backed up should be backed up first. ** Checkpoints are a reliable regret medicine only in the scenario where “it changed the code with an editing tool”.
Putting “novices think it can be saved” and “whether it can actually be saved” together, the counter-consensus at the beginning stands:
| Something went wrong | Newbies think /rewind can save | Actuality | The real solution |
|---|---|---|---|
| Claude used the editing tool to change the code | ✅ | ✅ can be saved | /rewind |
Claude ran rm and deleted the wrong file | ✅ | ❌ Unable to save | git commit / backup in advance |
| Claude ran a script to write the database and changed the data | ✅ | ❌ Unrecoverable | Database backup/transaction rollback |
Claude git push pushed up | ✅ | ❌ Cannot be saved | git level revert (the remote end has changed) |
| You modified the file with another editor | ✅ | ❌ Don’t recognize it | Your own undo / git |
The ”❌” in the middle lines are all variations of the pitfall at the beginning - What they have in common is that “the changes ran outside the view of the checkpoint”: either bash was used instead of the editing tool, or it happened outside Claude Code, or the changes were simply pushed to the external system. **As long as the consequences of an event fall outside the “code file on disk”, the checkpoint is out of reach. ** Memorizing this sentence saves more brainpower than memorizing the restriction list.
💡 One sentence summary: The checkpoint only cares about files + conversations modified by the editing tool, which can be recovered; The side effects of bash commands (
rm/mv), external changes, and issued requests cannot be recovered - one sentence judgment: If the consequences fall outside the “code file”, it cannot reach it, don’t use/rewindas insurance.
05 Division of labor with git: local undo vs. permanent history, no one can replace the other
At this point, the opening sentence “Don’t use checkpoints as git” can be thoroughly explained. **Many people are confused as soon as they get started, “With checkpoints, do we still need git?” - the answer is: yes, and they don’t compete for jobs at all. **
The official nailed this relationship down in one sentence, and it’s worth framing:
Think of checkpoints as “local undo” and Git as “permanent history”.
Analogy: corrections in a scratch pad vs. handing over a formal document for filing. ** Checkpoints are like writing and drawing in a scratch pad - if you make a mistake, just erase and rewrite. It’s fast, casual, and only meaningful to you. Throw the notebook away when you’re done with it (30 days later). git is like printing out the final draft, signing it, and putting it in a filing cabinet - it leaves a trace, can be shown to others, can be traced back to any version, and is saved permanently. You would not refrain from filing official documents because the drafts can be erased, nor would you even use the official documents to revise the drafts just because they need to be filed. **You have to have both, everyone does his or her own thing. **
Official division of labor list:
- Continue to use version control (e.g. Git) for commits, branches and long-term history;
- Checkpoints supplement but do not replace proper version control.
Put them side by side and the difference is clear at a glance:
| Dimensions | Checkpoint | Git |
|---|---|---|
| Who triggers | Automatic (per prompt) | Manual (you git commit) |
| Granularity | One for each prompt, very detailed | One commit at a time, you decide |
| Ignore bash side effects | ❌ Ignore | ✅ Submitted files can be restored |
| How long to save | Cleared by default with cleanupPeriodDays | Permanent (until you delete the history) |
| Can you share/collaborate | ❌ Purely local, only for you | ✅ Push it up and it will be visible to the whole team |
| Most Suitable | ”This step is broken, jump back” and regret immediately | Milestones, permanent history, collaboration |
Note: git also cannot control external side effects such as issued requests and database changes. It can only help you restore the submitted files on the disk.
Use which one when, I will give you a set of methods:
- Run fast in small steps and regret at any time → Checkpoint. If the first version doesn’t work
/rewind, try another version. You don’t need to touch git at all, it’s smooth. - Complete a decent stage and want to survive for a long time →
git commit. Once a function is completed, tested, and submitted, this is the “permanent archive.” - To enable bash side effects to be rolled back → only rely on git. As mentioned in the previous section, checkpoints cannot control
rm, but as long as you commit regularly, git can retrieve the status of the entire workspace.
The relatively stable rhythm is as follows: **When Claude is working, rely on checkpoints to rewind and make mistakes at any time; every time you complete a small stage that can be run through, immediately git commit will nail a permanent archive point. ** The combination of these two is equivalent to “fine-grained casual cancellation” superimposed on “coarse-grained permanent milestones”, double insurance. **The lesson that really bites people is this: I was too trusting in checkpoints, and I didn’t make a commit all afternoon. As a result, the session crashed and reopened. Although the code files were still there, the long string of “chapter marks” were all broken - I wanted to go back to an intermediate state three hours ago, but I couldn’t go back. Therefore, it is even more important to develop the muscle memory of “submit as soon as you pass”. **
Regarding how git cooperates with Claude Code (let it help you write commit messages and manage branches), there is a special article in Part 43 “Git Workflow”. Here you only need to remember one thing: **Checkpoints are local undo, and git is permanent history. The former complements the latter and never replaces it. **
Finally, there is an advanced fork in the road. The official mentioned this: If you want to try a different method and keep the current session intact, don’t use “summary” (it will change the context of your current session), but use fork:
claude --continue --fork-sessionIt will fork a new branch based on the current session to try, and the original session will be intact. You should know this trick first, and then turn to “Continue/Resume Session” in Chapter 34 when you really want to try two ideas in parallel.
💡 Summary in one sentence: checkpoint = automatic local undo (fine, fast, purely local, will expire), git = manual permanent history (traceable, collaborative, not lost); small steps of trial and error rely on checkpoints, milestones and side effects rollback rely on git, and
commitis required to run through a stage.
06 Hands-on: Make a “correction” with your own hands, and then rewind it
You can’t remember it just by watching it. The following minimum process will take you through the complete closed loop of “Claude changes the file → you regret it → /rewind and rewind it”. It does not depend on any complex projects, just find an empty folder and run it. Open a terminal and follow along.
Step one: Create a toy folder and put a file that can be understood at a glance
mkdir ~/rewind-demo && cd ~/rewind-demo
git init
printf 'hello\n' > note.txt
git add note.txt && git commit -m "init: 初始 note"Expected: There is only one line of hello in note.txt, and a git commit was made (I will compare the difference between checkpoints and git later).
Step 2: Start Claude and let it change this file
claudeAfter entering, issue the first command (this prompt will trigger the first checkpoint):
把 note.txt 的内容改成三行:apple、banana、cherry,用编辑工具改Expected: Claude uses the editing tool to change note.txt into three lines of fruit (in default mode, it will first give diff and wait for your approval to approve it). The purpose of emphasizing “use editing tools” is to make this change fall into the tracking range of the checkpoint - this is the kind of thing that /rewind can save.
Step 3: Post another one and change it to be more “unrecognizable”
再把这三行全删掉,换成一行:这是我不想要的版本Expectation: note.txt now only contains “This is the version I don’t want”. At this point you have sent two reminders and there are two chapter markers on the timeline.
Step 4: Open the rewind menu and rewind
Make sure the input box is empty, then double-click Esc** (or type /rewind directly):
(输入框空着,Esc Esc)Expected: A back menu will pop up, listing the two prompts you just sent. **Select the point before the first prompt (the time when it was changed to three rows of fruits), and then select “Restore Code and Dialogue”. **
Step 5: Verify that the rewind is successful
Go back to the terminal (or run in a session with !) and take a look at the file:
! cat note.txtExpected: note.txt changed back to one line hello - your two changes were all reversed, and the code and dialogue returned to before the change. **Seeing hello back = checkpoint rewind successful. ** This is the power of “local undo”: you can roll back two rounds of changes purely by relying on checkpoints without typing a single git command.
Step Six (Key Control): Verify that bash side effects cannot be reversed
Now let it be deliberately deleted using the bash command to experience the boundary in Section 04. Post in the conversation:
用 bash 命令(rm)把 note.txt 删掉After it is deleted, try /rewind to return to the point before deletion and select “Restore Code”. Then look at:
! lsExpected: note.txt not returned, it cannot be found in ls. This confirms that things changed by the **bash command (rm) cannot be tracked by the checkpoint and cannot be saved by /rewind. **Want to retrieve it? It’s now git’s turn to come into play:
git checkout note.txt(This will use the init commit in git to restore the file.) Expectation: note.txt is back with hello - **git, the “permanent history”, fills in the area beyond the checkpoint. **
After running these six steps, you have personally verified the two most core things in this article: **The checkpoint can rewind the changes of the editing tool smoothly (step 5), but it cannot control the side effects of bash - that depends on git (step 6). ** These two results, positive and negative, are more memorable than the boundary mentioned ten times before.
💡 Summary in one sentence: This set of actual combat allows you to see with your own eyes - editing tool changes,
/rewindone-click return; bashrmdeletes, checkpoints are helpless, have to rely ongit checkoutto retrieve. One positive and one negative, the boundary is carved into it.
07 Summary
This article completely dismantles the “automatic safety net” of Claude Code - the checkpoint is a code snapshot it automatically takes before each edit, allowing you to rewind at any time, but it has clear boundaries and is a partner with git, not a substitute. **
Put the core points into a list and keep it in your pocket:
| What you want to know | Conclusion | Key points |
|---|---|---|
| What is a checkpoint | Code snapshot automatically taken before each prompt | Fully automatic, no need for you to save manually |
| How to rewind | /rewind or double-click Esc on the empty input box | Double Esc when there are words in the input box will clear it and not open the menu |
| What to choose in the menu | First select “Which point to return to” and then “How to return" | "Restore” the retreat status / “Summary” press the context, don’t mess around |
| What can be rolled back | Files + conversations changed by editing tools | Can these two be rolled back |
| What cannot be restored | bash side effects, external changes, sent requests | Changes in rm/mv cannot be restored |
| What’s the relationship with git | Local undo vs permanent history | Small steps of trial and error rely on it, milestones and side effects rely on git |
You should now be able to: Explain clearly what a checkpoint is and when it will automatically save it for you; use /rewind or double-click Esc to open the rollback menu, and distinguish the difference between “restore” and “summary”; have a clear boundary line in mind - editing tools can be changed, but bash side effects and external states cannot be recovered; and know how it and git divide the work and when to commit. **Engrave this boundary firmly, and the checkpoint is the real safety net that can support you, rather than a “fake regret medicine” that will deceive you at the critical moment. **
Going back to the beginning sentence: Checkpoints are indeed a regret medicine, but they can cure “the code has been changed”, but cannot cure “rm was deleted incorrectly” - **The former can rest assured /rewind, while the latter can honestly git commit lead the way. ** If you distinguish between these two medicines, you will be less likely to stumble than the person at the beginning.
Next article 38 “Plug-in Reference Manual” - How do you package the Skills, Hooks, Subagent, MCP, and various commands in this article that you have learned along the way into a “plug-in” that can be installed and uninstalled, and can be shared with others? Article 24 will get you started. This article uses the complete structure and list fields of the plug-in as a reference book. Think about it: If you want to turn your convenient configuration into a “pack-and-go” bag for a friend, what does it look like inside?